


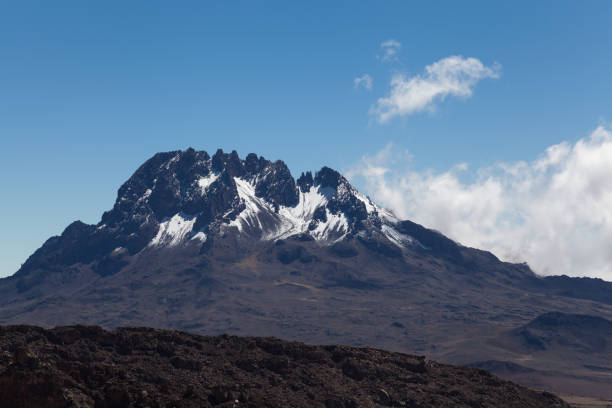
Kilimanjaro Lemosho Route Overview — The Best Complete Guide to Climbing Mount Kilimanjaro
The complete Lemosho Route guide — rainforest, Shira Plateau, Barranco Wall, Lava Tower and camping camps at Mti Mkubwa, Shira, Barranco, Karanga and Barafu. Compare 7-day vs 8-day itineraries, difficulty for beginners, success rates, altitude and acclimatization, cost and prices, best time to climb, maps, expert tips and booking advice for Uhuru Peak (5,895 m).
What is the Lemosho Route?
The Lemosho Route is widely considered the most scenic and beautiful route on Mount Kilimanjaro. Starting from the west side of the mountain near Londorossi Gate, the Lemosho Route traverses the Shira Plateau before joining the Machame Route near Barranco Camp. With its longer itinerary (7-8 days) and excellent acclimatization profile, Lemosho boasts the highest summit success rate of any Kilimanjaro route at 90-95%.
The route offers incredible biodiversity. You begin in lush montane rainforest, climb through heath and moorland, cross the vast Shira Plateau (one of the largest volcanic calderas in the world), traverse alpine desert, and finally ascend to the arctic summit. The variety of landscapes on the Lemosho Route is unmatched.
Lemosho is our top recommended route at Kizza Adventures for anyone who has the time and budget. The combination of stunning scenery, low crowds, and high success rates makes it the ultimate Kilimanjaro experience. Most of our private groups choose the 8-day Lemosho itinerary for maximum acclimatization.
Why Choose the Lemosho Route?
Highest Success Rate
The Lemosho Route has the highest summit success rate of any route at 90-95%. This is due to the longer itinerary and excellent acclimatization profile — the route spends significant time at altitude before attempting the summit.
Stunning Scenery
Lemosho is the most scenic route on Kilimanjaro. The traverse across the Shira Plateau offers breathtaking views of the mountain and the Great Rift Valley. You'll experience every climate zone on Earth in just one week.
Low Crowds
Because Lemosho starts on the remote western side of the mountain, it sees significantly fewer climbers than Marangu or Machame. The trail feels wild and untouched, especially in the first few days.
Excellent Acclimatization
The Lemosho Route follows a "climb high, sleep low" pattern naturally. The route ascends the Shira Plateau early, then descends slightly before climbing higher — giving your body time to adjust to altitude.
Longer Duration
At 7-8 days, the Lemosho Route requires more time commitment and a higher budget than shorter routes. You'll need to plan for additional days on the mountain. This is the trade-off for the highest success rates.
More Expensive
The longer itinerary means higher park fees, crew wages, and equipment costs. Lemosho is typically $300-500 more expensive than Machame or Rongai for the same level of service.
Complete Lemosho Route Overview
Our Guides' Verdict on the Lemosho Route
Straight talk from the team that climbs it every month — which length to book, and who should skip the short one.
1,600+ climbers guided on Kilimanjaro
Lemosho is our favourite route for first-timers who have the days to spare: the western approach is quiet, the scenery never repeats, and the acclimatization profile is the most forgiving on the mountain. But length is the whole game — take the 8-day itinerary if you can, the 7-day at minimum.
- Book 8 days for your best odds. The extra day buys the “climb high, sleep low” rhythm — Lava Tower by day, Barranco to sleep — that makes summits.
- 7 days is the honest standard. Fit first-timers with hill fitness do very well on seven; it keeps the key acclimatization day while saving a day’s cost.
- 6 days only if pre-acclimatized. The short schedule suits trekkers fresh off high mountains (Meru, Kenya, Rwenzori) — not sea-level beginners.
- Expect crowds to join later. Lemosho starts wonderfully quiet, then merges with the Machame crowds from Barranco onward — early starts keep you ahead of them.
- Rainy season? Still excellent. The western forests handle rain well and crowds thin out — with good gear, March–May and November climb beautifully.
- Climb it in the dry months if you can. June–October and January–March give the kindest skies for Barranco Wall photos and summit sunrise.
Climb with a Moshi-based team that briefs you the night before, walks every step with you, checks your health twice daily on the mountain, and meets you at Mweka Gate with your summit certificate. Message us on WhatsApp with your dates and trekking background — we will tell you honestly whether Lemosho 6, 7 or 8 days is your route.
Lemosho Route — Day-by-Day Itinerary
The full 7-day and 8-day itineraries with hiking times, distances, elevations and camp photos — pick your trek length below.
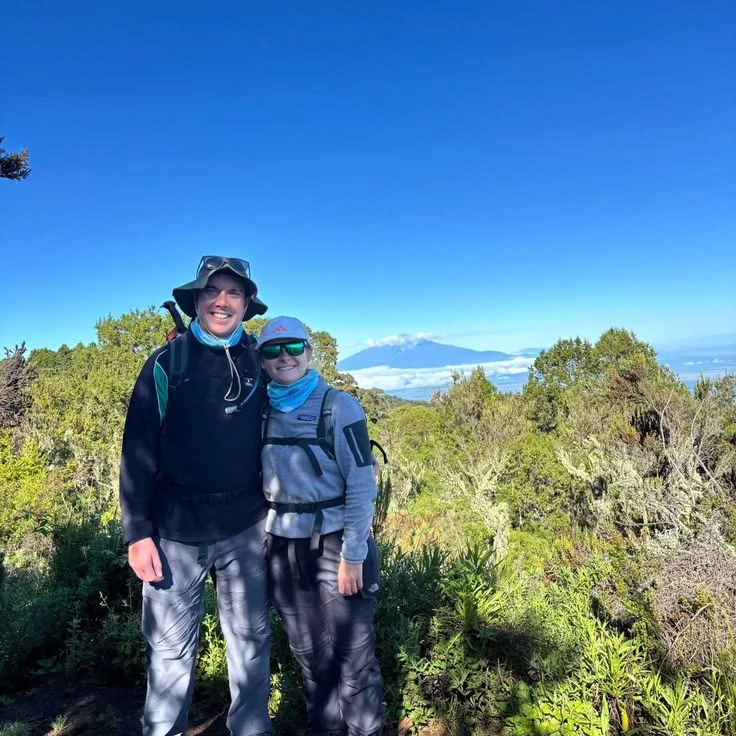
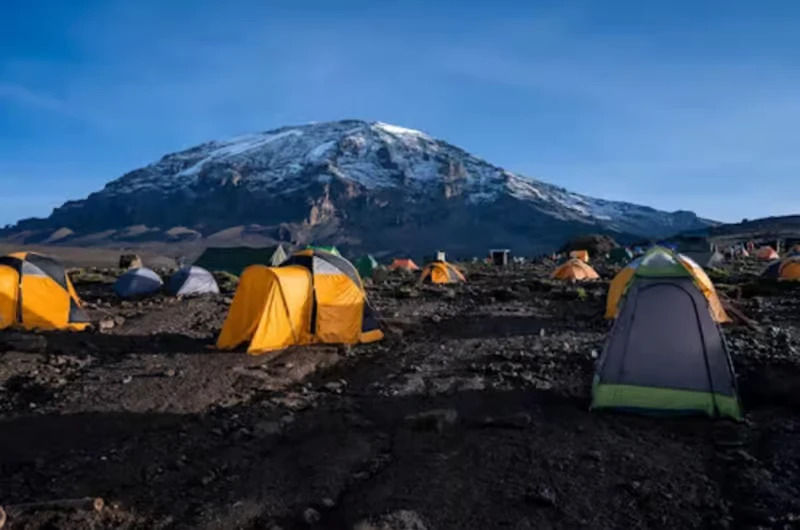
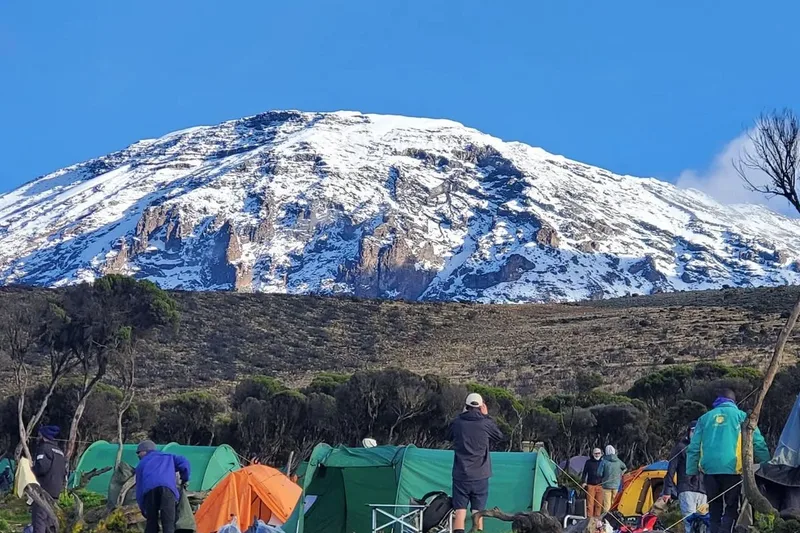
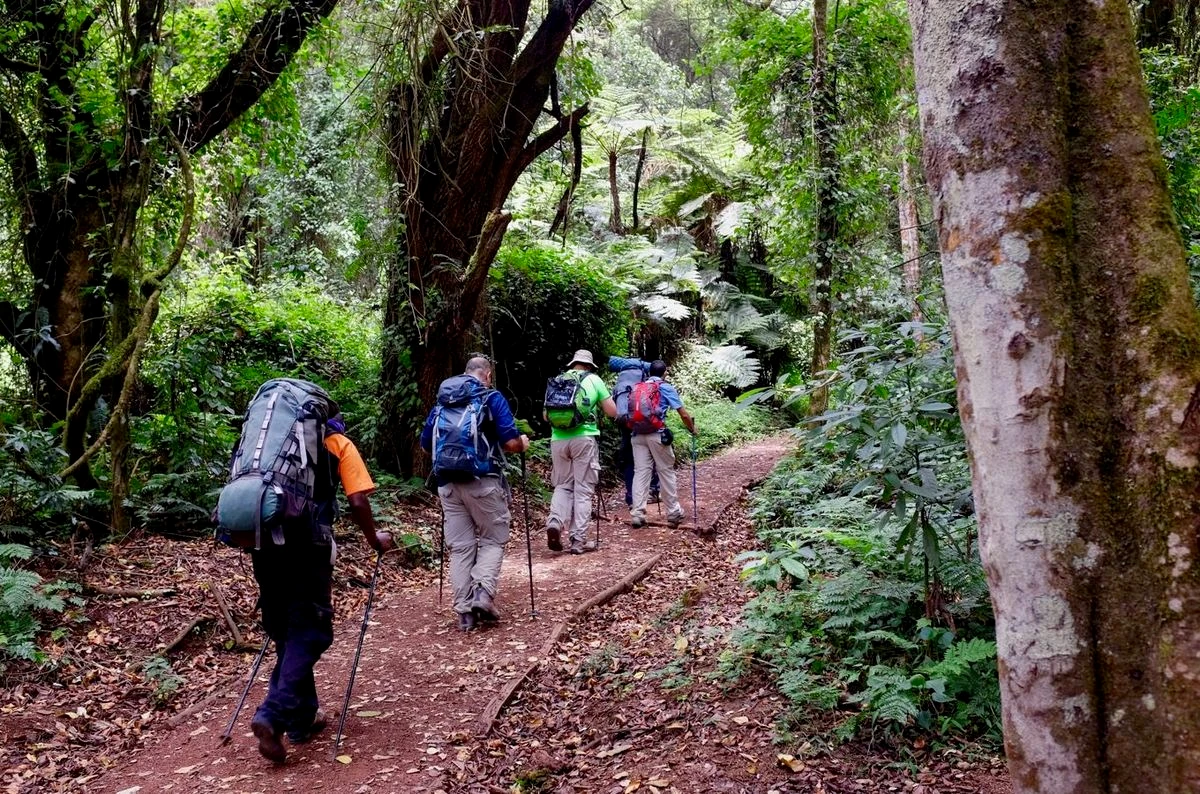
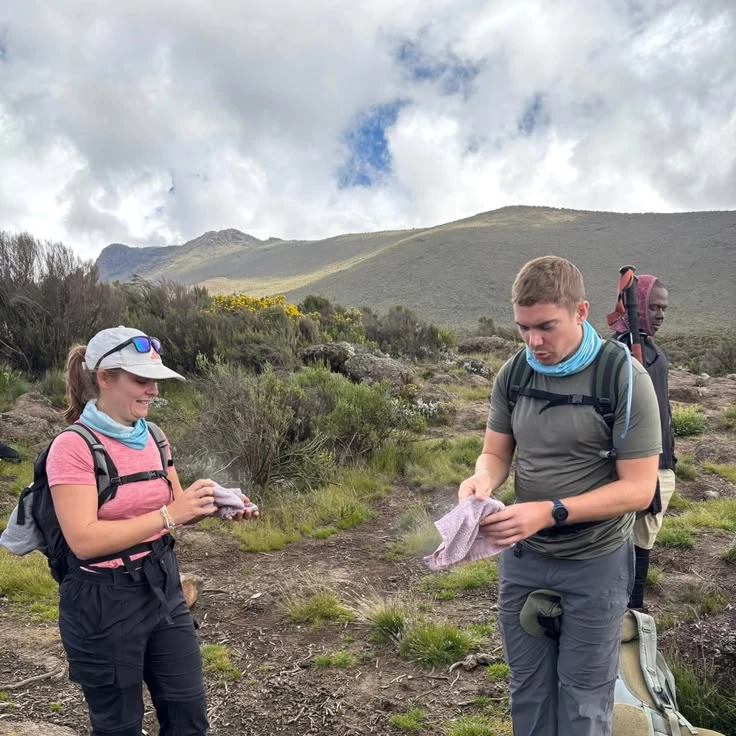
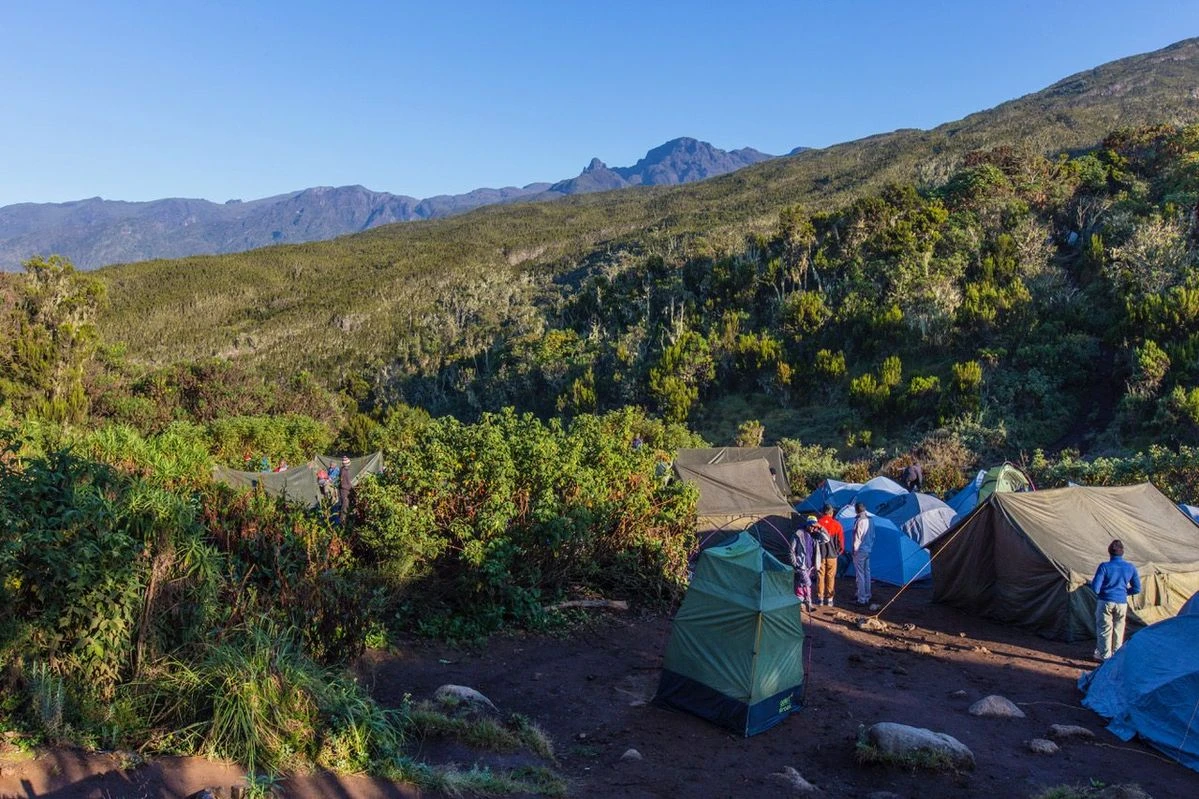
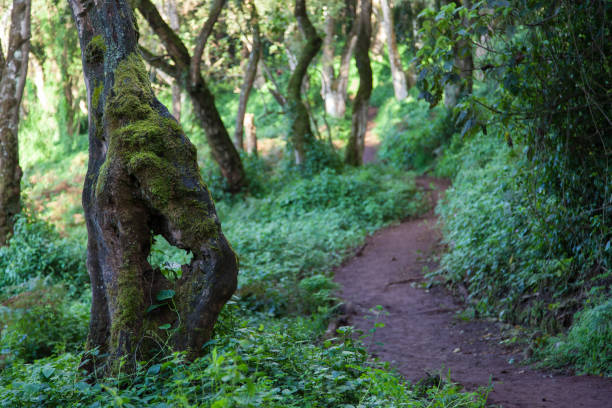
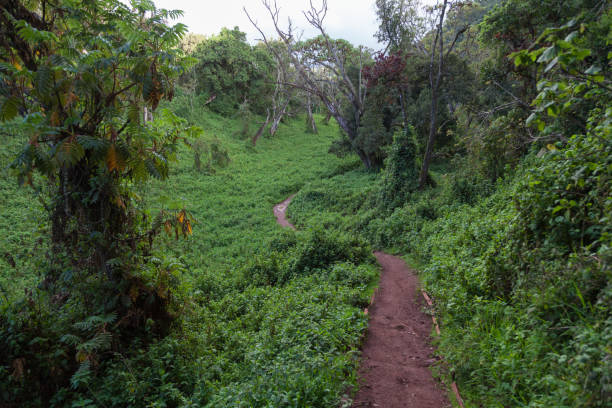
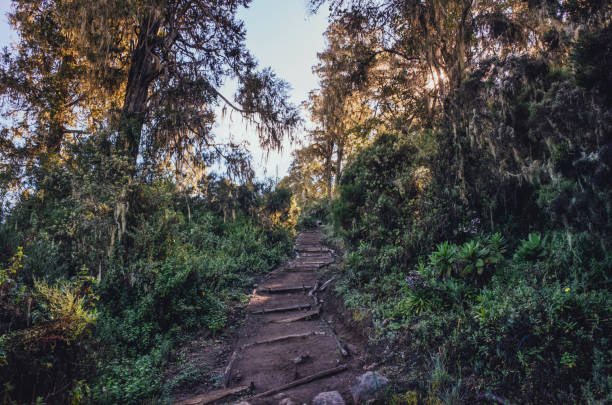
After breakfast at your hotel in Moshi or Arusha, you will be picked up by our professional mountain guide and transferred to Londorossi Gate, the starting point of your Mount Kilimanjaro adventure. Upon arrival, your guide will assist with park registration and entry formalities before you begin your trek through the magnificent montane rainforest. The trail winds through lush vegetation, towering trees, and beautiful forest scenery, accompanied by the sounds of birds and other wildlife. Along the way, you may have the opportunity to spot black-and-white colobus monkeys and other forest species. Your guide will lead you at a comfortable pace, allowing you to enjoy the natural surroundings while gradually adjusting to the altitude. After approximately 3–4 hours of trekking, you will arrive at Mti Mkubwa Camp, also known as Big Tree Camp, where your mountain crew will have your tents prepared. Enjoy a freshly cooked dinner, relax in the peaceful forest environment, and spend your first night on the mountain as you prepare for the next day’s trek toward the Shira Plateau.
- Accommodation: Mti Mkubwa Camp
- Meals: Lunch and dinner
- Trekking distance: Approximately 6 km
- Trekking time: Approximately 3–4 hours
- Starting elevation: 2,100 m
- Camp elevation: 2,800 m
- Altitude gained: ~700 m
- Terrain: Montane rainforest
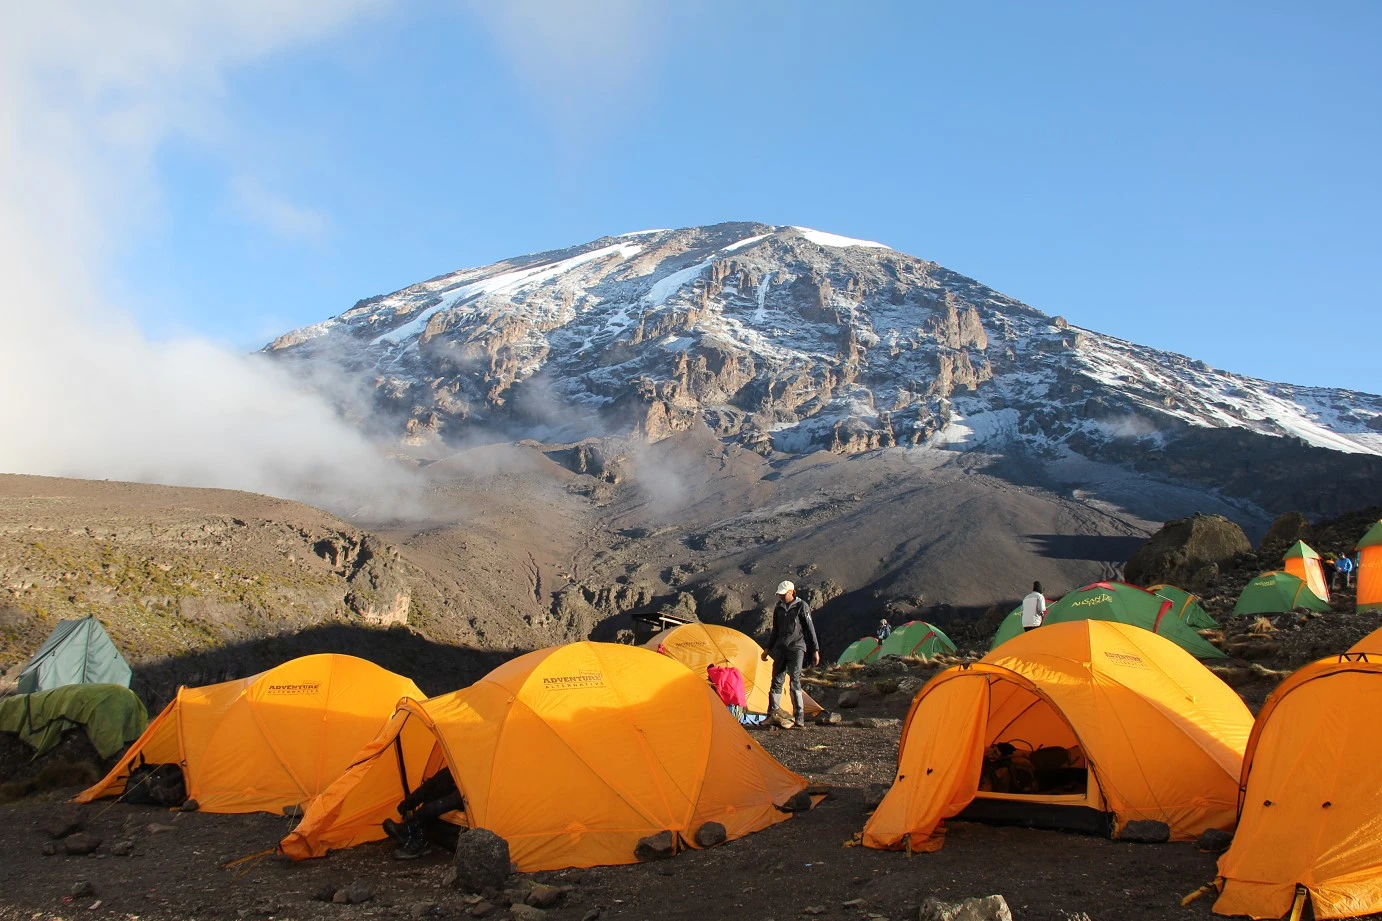
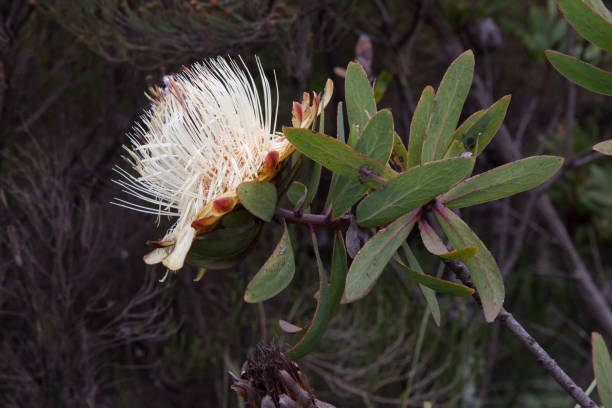
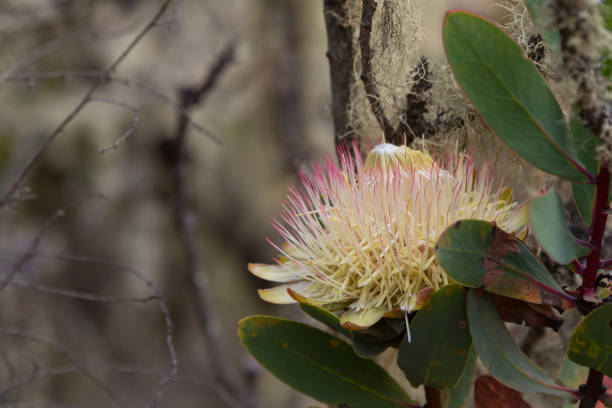
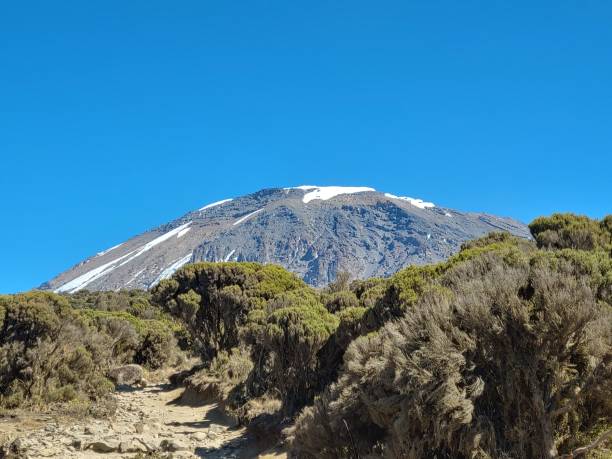
After an early breakfast at Mti Mkubwa Camp, you will continue your trek along the beautiful Lemosho Route, gradually leaving the lush montane rainforest behind as you ascend into the heath and moorland zone of Mount Kilimanjaro. The trail becomes more open, offering spectacular views of the surrounding valleys, rolling hills, and the magnificent Kibo Peak. Along the way, you will encounter unique mountain vegetation, including giant heather plants and other fascinating high-altitude flora. Your experienced mountain guide will lead you at a steady pace, allowing you to enjoy the breathtaking scenery while helping your body adjust to the increasing altitude. As you approach the Shira Plateau, the landscape opens into a vast, scenic expanse with panoramic views of Kilimanjaro’s rugged volcanic terrain. After approximately 4–6 hours of trekking, you will arrive at Shira 1 Camp, situated at about 3,500 m above sea level. Upon arrival, you will have time to relax, enjoy refreshments, and admire the spectacular mountain surroundings before your crew serves a freshly prepared dinner. Spend the evening resting at camp and preparing for the next day’s trek.
- Accommodation: Shira 1 Camp
- Meals: Breakfast, lunch, and dinner
- Trekking distance: Approximately 8 km
- Trekking time: Approximately 4–6 hours
- Starting elevation: 2,800 m
- Camp elevation: 3,500 m
- Terrain: Heathland and moorland
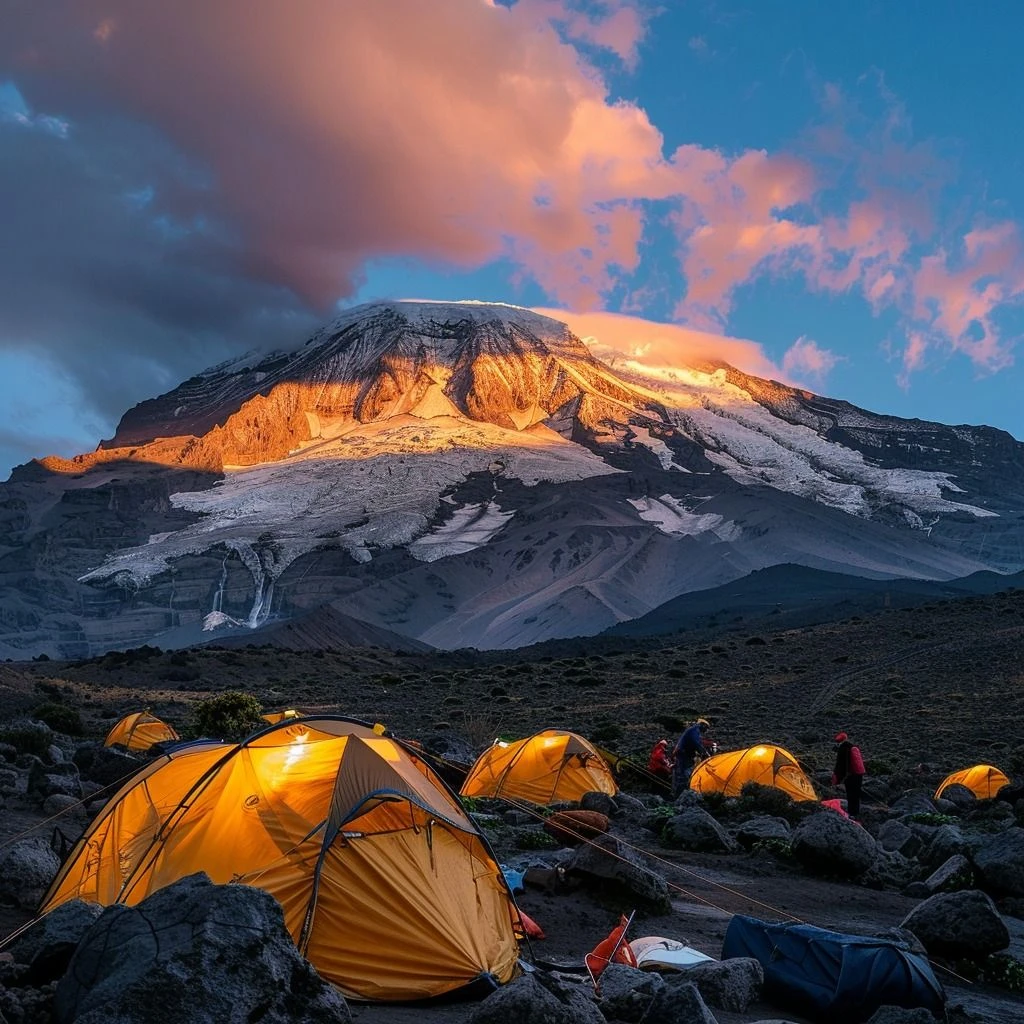
After breakfast at Shira 1 Camp, you will continue your trek across the magnificent Shira Plateau, enjoying spectacular views of Mount Kilimanjaro’s towering peaks and the surrounding volcanic landscape. The trail winds through open moorland, rolling hills, and rugged high-altitude terrain, offering excellent opportunities to admire the mountain’s unique vegetation and capture beautiful photographs. As you progress, you will gradually leave the main Shira Plateau trail and continue toward the remote and scenic Moir Hut area on the northern side of the mountain. This less-traveled section of the Lemosho Route provides a more peaceful trekking experience, with breathtaking views across the plateau and the dramatic slopes of Kibo Peak. Your experienced mountain guide will maintain a steady pace, allowing you to enjoy the scenery while helping your body adapt to the increasing altitude. Upon arrival at Moir Hut approximately 4,200 m (13,780 ft), you will settle into camp, enjoy a freshly prepared meal, and have time to rest in the quiet alpine surroundings. Depending on your arrival time and weather conditions, your guide may organize a short acclimatization walk nearby before dinner. Spend the night at Moir Hut.
- Accommodation: Moir Hut campsite
- Meals: Breakfast, lunch, and dinner
- Trekking distance: Approximately 9–14 km
- Trekking time: Approximately 5–7 hours
- Camp elevation: Approximately 4,200 m (13,780 ft)
- Terrain: Moorland, rocky trails, and alpine desert
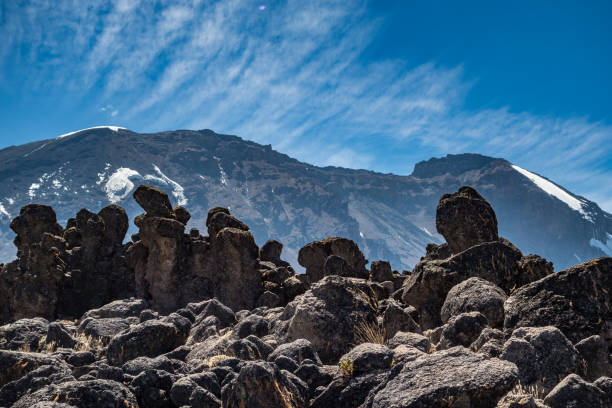
After breakfast at Moir Hut, you will continue your adventure across the rugged alpine desert of Mount Kilimanjaro, gradually ascending toward Lava Tower. The trail takes you through dramatic volcanic landscapes, rocky ridges, and high-altitude terrain, offering spectacular views of Kibo Peak and the surrounding mountain wilderness. As you gain elevation, your experienced mountain guide will encourage you to walk slowly and steadily to help your body adjust to the increasing altitude. Upon reaching Lava Tower, at approximately 4,630 m (15,190 ft), you will stop for lunch, surrounded by breathtaking mountain scenery and impressive volcanic rock formations. After lunch and a short rest, you will begin your descent toward Barranco Camp, passing through fascinating alpine landscapes and the distinctive giant groundsels that characterize the Barranco Valley.
As you approach camp, you will enjoy breathtaking views of the imposing Barranco Wall and the surrounding mountain slopes. After approximately 6–8 hours of trekking, you will arrive at Barranco Camp, situated at about 3,960 m (12,992 ft), where your mountain crew will prepare a freshly cooked dinner. Spend the evening relaxing, enjoying the peaceful mountain atmosphere.
- Accommodation: Barranco Camp
- Starting Point: Moir Hut (approximately 4,200 m)
- Highest Point: Lava Tower (approximately 4,630 m)
- Destination: Barranco Camp (approximately 3,960 m)
- Trekking Distance: Approximately 7–10 km
- Trekking Time: Approximately 6–8 hours
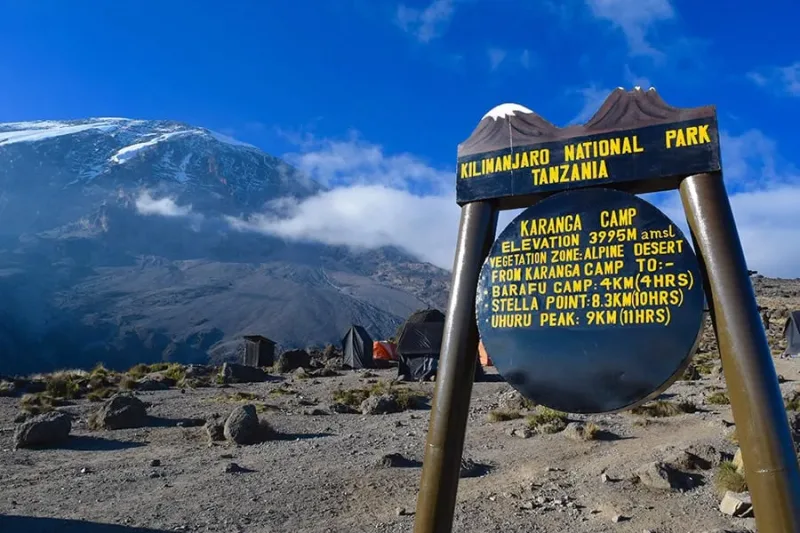
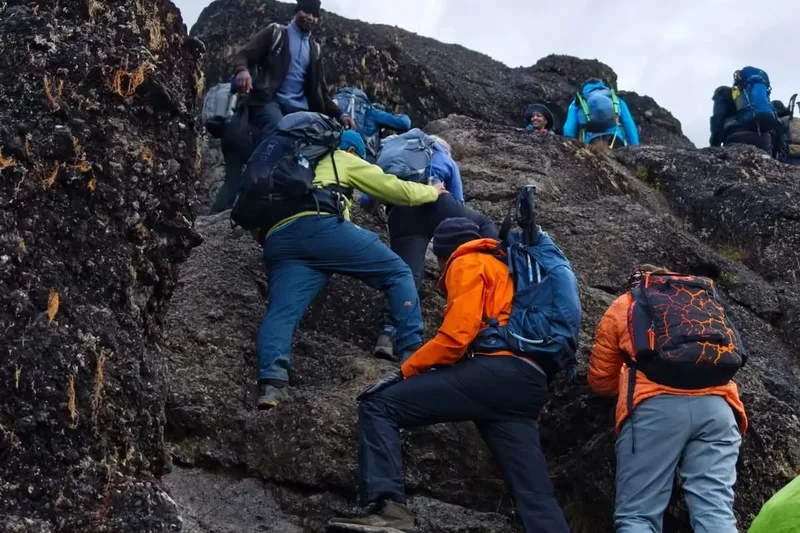
After an early breakfast at Barranco Camp, you will begin the day with an exciting climb up the famous Barranco Wall, one of the most memorable highlights of the Lemosho Route. With the guidance of your experienced mountain guide, you will carefully ascend the rocky wall, enjoying spectacular views of the surrounding valleys, glaciers, and towering peaks of Mount Kilimanjaro. Once you reach the top, you will continue trekking along scenic ridges and across rugged valleys, passing through the dramatic alpine desert landscape. Along the way, you will have opportunities to take memorable photographs and admire the breathtaking mountain scenery. Your guide will maintain a steady pace to help you conserve energy and continue acclimatizing to the altitude. After approximately 4–5 hours of trekking, you will arrive at Karanga Camp, situated at about 4,035 m (13,238 ft) above sea level. Upon arrival, you will enjoy a freshly prepared lunch or hot refreshments before taking time to relax and appreciate the spectacular views of the surrounding mountains. In the late afternoon, you can rest at camp while your mountain crew prepares dinner. Thereafter, you will have time to relax and enjoy the peaceful alpine surroundings.
- Accommodation: Karanga Camp
- Meals: Breakfast, lunch, and dinner
- Trekking distance: Approximately 5–6 km (3–4 miles)
- Trekking time: Approximately 4–5 hours
- Starting elevation: Approximately 3,960 m (12,992 ft)
- Camp elevation: Approximately 4,035 m (13,238 ft)
- Terrain: Rocky ridges, steep sections, and alpine desert
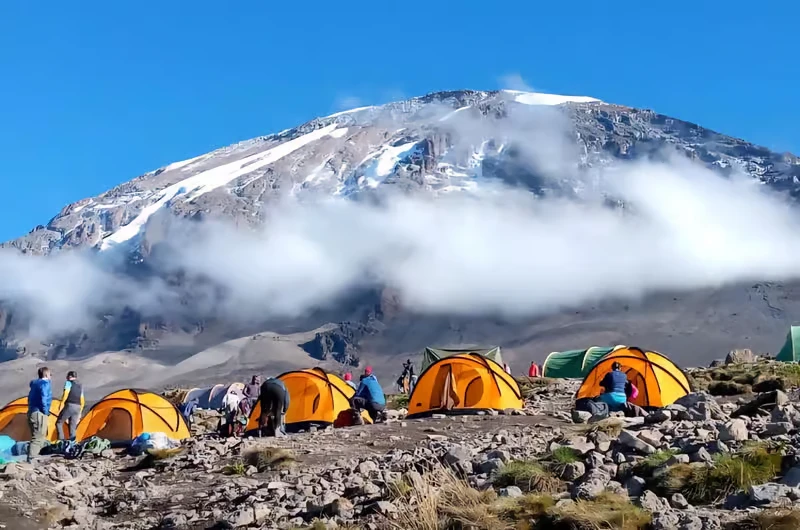
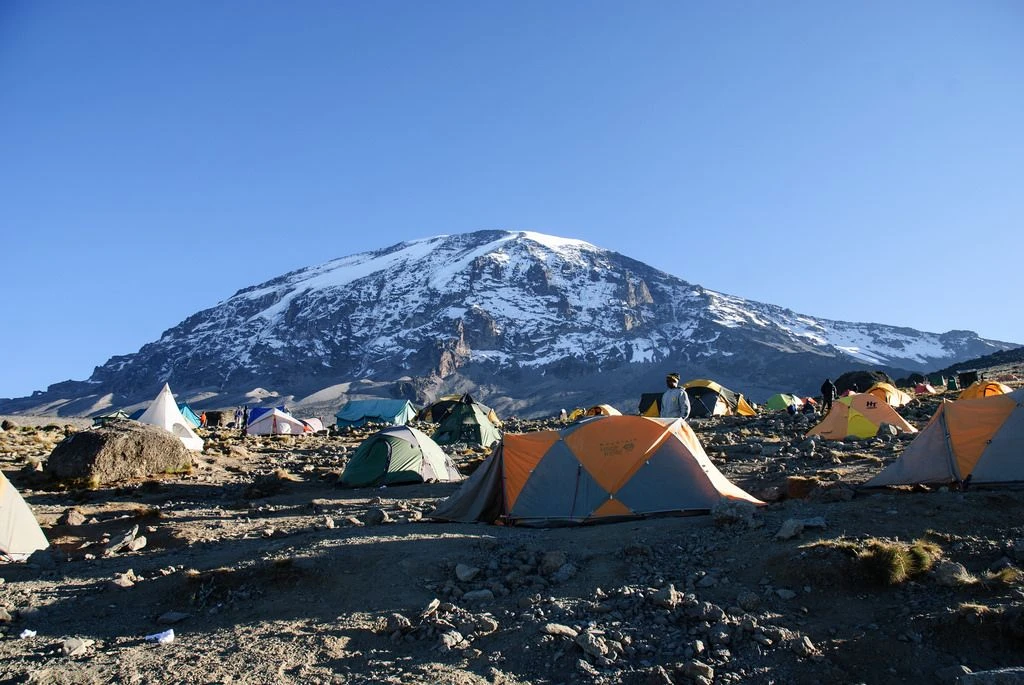
After breakfast at Karanga Camp, you will continue your ascent toward Barafu Camp, the final base camp before your unforgettable summit attempt on Mount Kilimanjaro. The trail takes you through a rugged alpine desert landscape, with rocky paths, sparse vegetation, and spectacular views of the surrounding mountain peaks. As you gradually gain altitude, your experienced mountain guide will encourage you to maintain a slow and steady pace to help your body adjust to the high elevation. Along the way, you will enjoy magnificent views of Mawenzi Peak and the imposing slopes of Kibo, offering excellent opportunities to take photographs and appreciate the beauty of the mountain. After approximately 3–5 hours of trekking, you will arrive at Barafu Camp, situated at about 4,673 m above sea level. Upon arrival, your mountain crew will prepare lunch and refreshments while you take time to relax, hydrate, and recover from the day’s hike. In the late afternoon, your guide will provide a detailed briefing about the summit attempt, including safety precautions and the equipment you will need for the challenging climb ahead. You will prepare your warm clothing, headlamp, trekking poles, and other essential gear before enjoying an early dinner. Thereafter, you will have time to rest and conserve your energy for the midnight departure toward Uhuru Peak, the highest point in Africa.
- Accommodation: Barafu Camp
- Meals: Breakfast, lunch, and dinner
- Trekking distance: Approximately 4 km (2.5 miles)
- Trekking time: Approximately 3–5 hours
- Starting elevation: Approximately 4,035 m (13,238 ft)
- Camp elevation: Approximately 4,673 m
- Terrain: Rocky trails and alpine desert
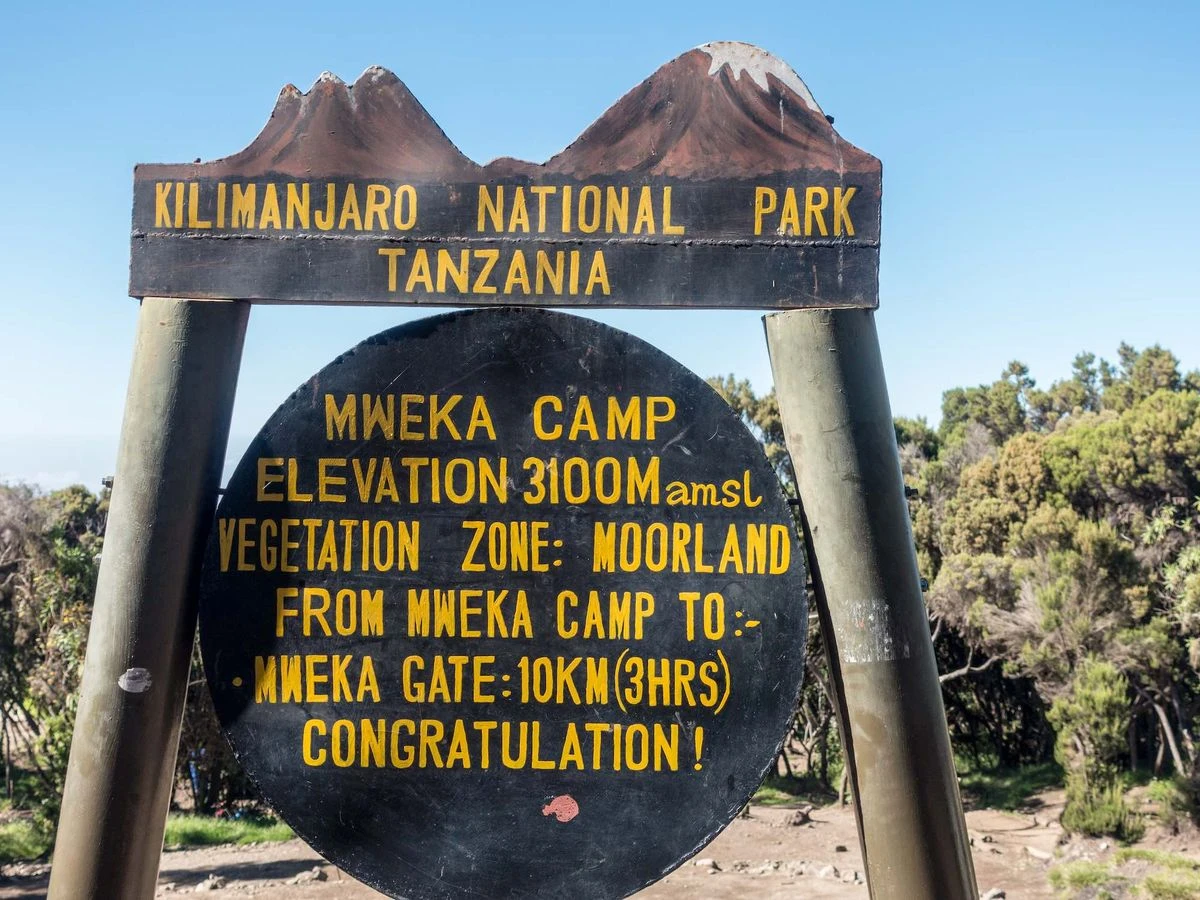
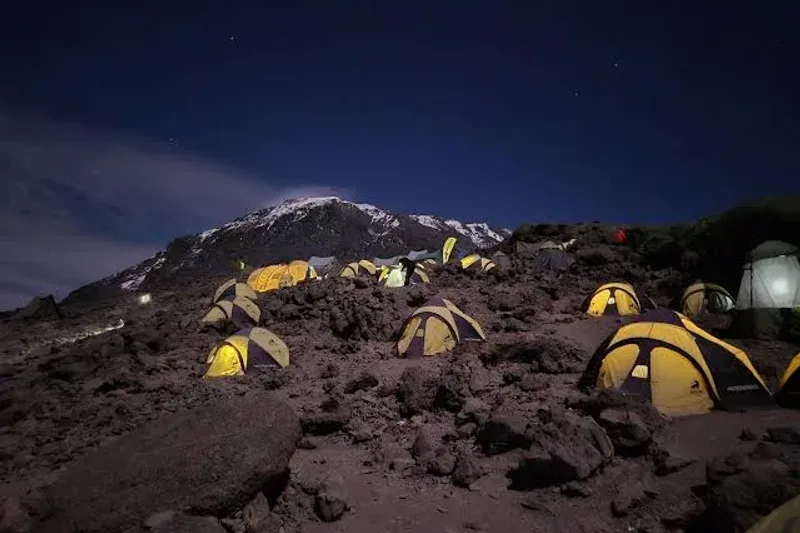
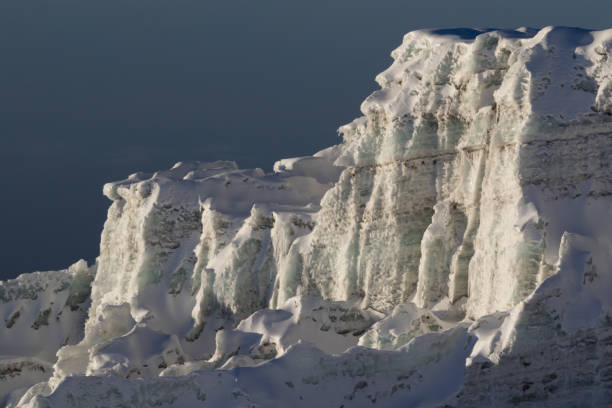
Your summit adventure begins around midnight after a light snack and a hot drink at Barafu Camp. Accompanied by your experienced mountain guides, you will begin the challenging ascent toward the summit of Mount Kilimanjaro under the beautiful African night sky. Trekking slowly along steep, rocky trails and volcanic scree, you will make your way toward Stella Point on the crater rim, where you may witness a spectacular sunrise over the African landscape. From there, you will continue along the crater rim to Uhuru Peak, standing at 5,895 m (19,341 ft) above sea level, the highest point in Africa. Upon reaching the summit, you will celebrate your incredible achievement, take memorable photographs beside the famous Uhuru Peak sign, and enjoy breathtaking views of the surrounding glaciers and snow-capped summit. After spending a short time at the top, you will begin the descent to Barafu Camp for a brief rest and refreshments before continuing downhill toward Mweka Camp. The descent takes you through dramatic alpine desert terrain before gradually entering the heath and moorland zones of the mountain. After a long and rewarding day of approximately 10–14 hours of trekking, you will arrive at Mweka Camp where you will spend a night.
- Accommodation: Mweka Camp
- Meals: Breakfast, lunch, and dinner
- Summit ascent distance: Approximately 5 km (3 miles)
- Descent distance: Approximately 12 km
- Total trekking time: Approximately 10–14 hours
- Starting elevation: Approximately 4,673 m
- Summit elevation: 5,895 m (19,341 ft)
- Mweka Camp elevation: Approximately 3,100 m (10,170 ft)
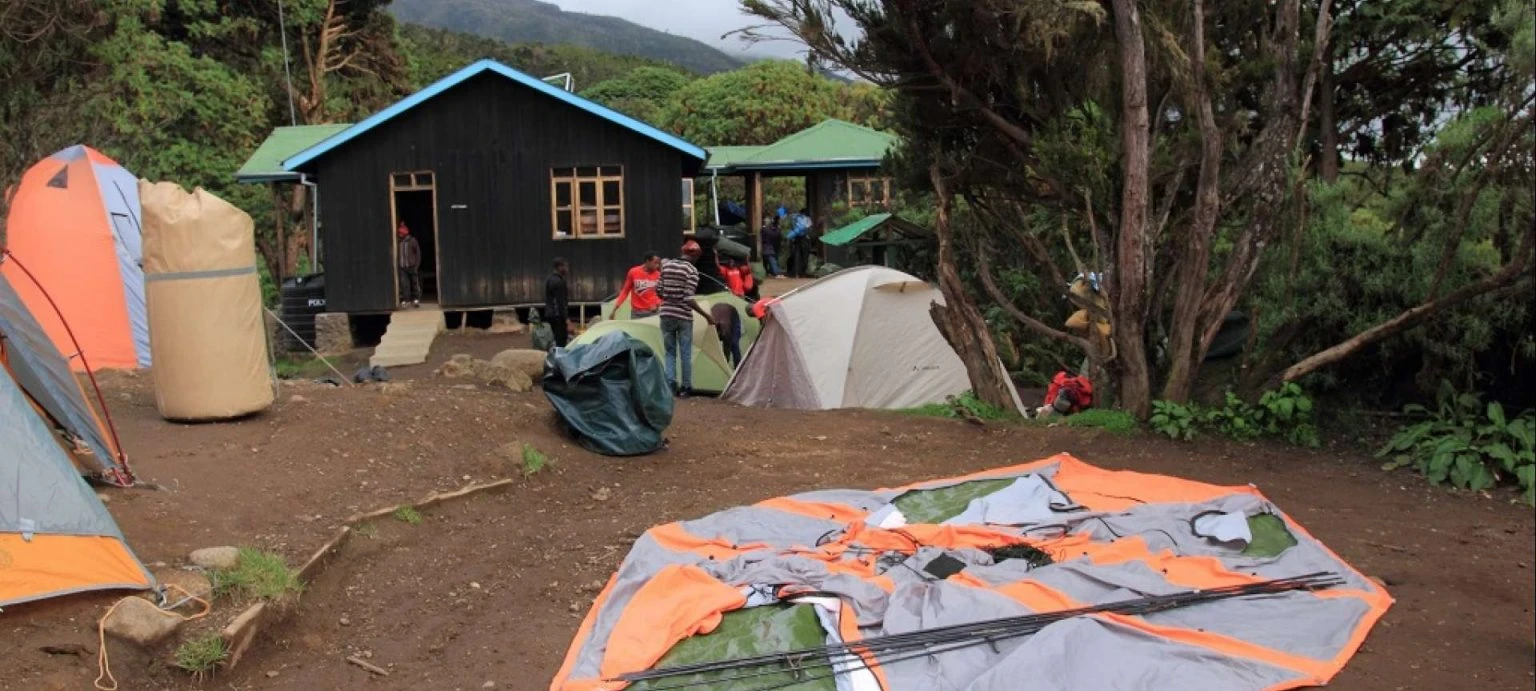
Early in the morning, after breakfast at Mweka Camp, you will begin your final descent through the beautiful montane rainforest of Mount Kilimanjaro. The trail winds downhill beneath a canopy of lush green trees, surrounded by unique mountain vegetation, colorful birds, and the refreshing sounds of the forest. As you descend, you will enjoy the cool forest atmosphere and reflect on the incredible achievement of reaching Uhuru Peak, the highest point in Africa. Your experienced mountain guide and support team will accompany you along the trail until you arrive at Mweka Gate, where you will complete the park exit formalities and receive your Kilimanjaro summit certificate in recognition of your achievement. Thereafter, you will have time to celebrate with your mountain crew and take memorable photographs before meeting your driver for a transfer back to your hotel in Moshi.
- Meals: Breakfast and lunch
- Trekking distance: Approximately 9–10 km (5.6–6.2 miles)
- Trekking time: Approximately 3–4 hours
- Terrain: Montane rainforest
- End of trek: Transfer to Moshi
Lemosho Route Campsites
The Lemosho Route is a camping-only route. Here are the campsites you'll stay at.
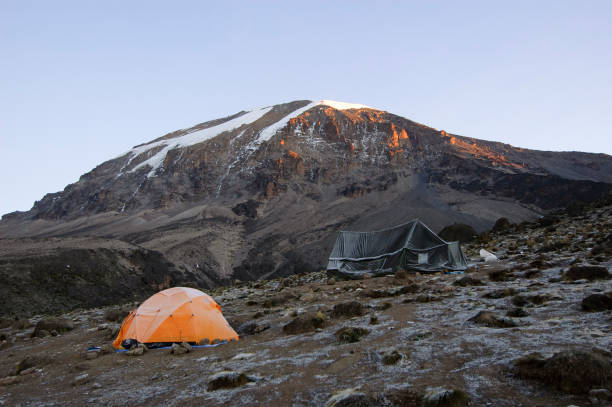
Mti Mkubwa Camp (2,800m)
Elevation: 2,800m
Terrain: Forest clearing
Facilities: Tent platform, basic toilets
Water: Stream water (treated)
Your first camp in the forest zone. Named after the giant fig tree that towers over the campsite, surrounded by lush montane rainforest alive with birdsong.
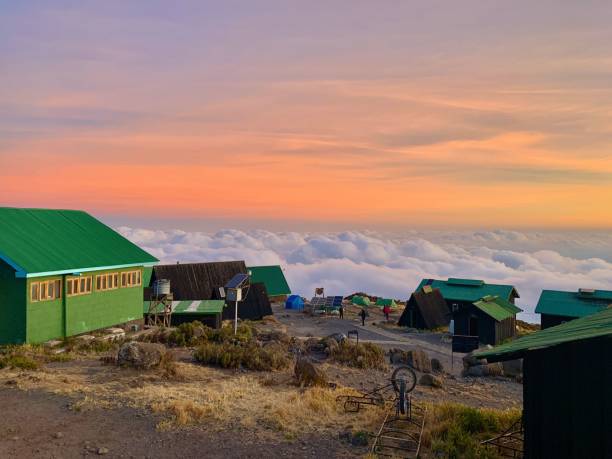
Shira 1 Camp (3,500m)
Elevation: 3,500m
Terrain: Open plateau
Facilities: Tent platform, basic toilets
Water: Piped water available
On the edge of the Shira Plateau with panoramic views of Kilimanjaro and the Great Rift Valley stretching to the horizon.
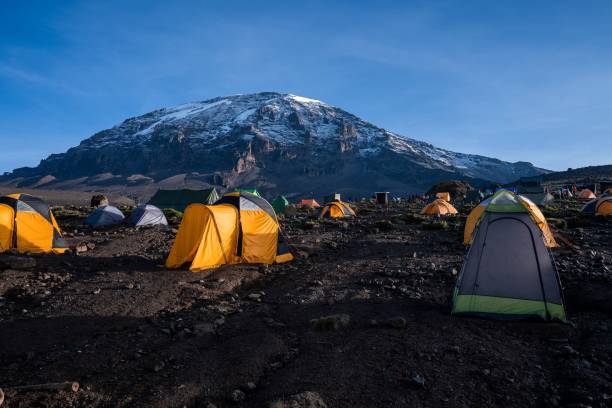
Shira 2 Camp (3,850m)
Elevation: 3,850m
Terrain: Grassy plateau
Facilities: Tent platform, basic toilets
Water: Stream water (treated)
In the heart of the Shira Plateau, surrounded by giant groundsels and lobelias with the mountain looming ever closer.
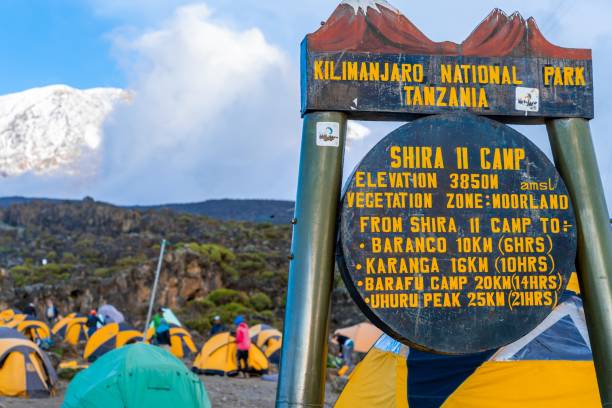
Barranco Camp (3,960m)
Elevation: 3,960m
Terrain: Sheltered valley
Facilities: Tent platform, basic toilets
Water: Stream water (treated)
Below the Barranco Wall in a lush valley, surrounded by giant groundsels with dramatic views of the Heim Glacier above.
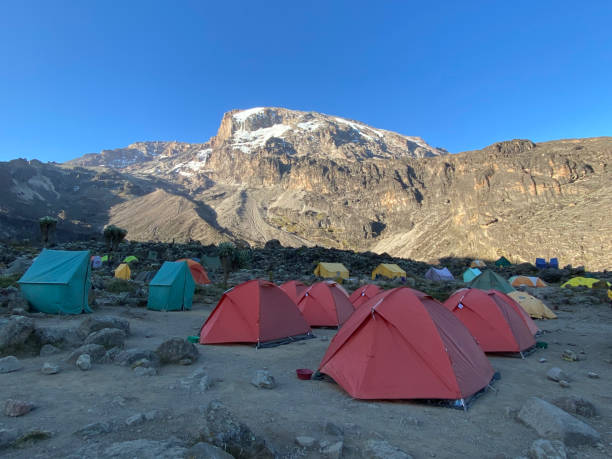
Karanga Camp (4,035m)
Elevation: 4,035m
Terrain: Rocky ridge
Facilities: Tent platform, basic toilets
Water: Last water point
The last water stop before the summit. A small camp on a rocky ridge with stark alpine desert stretching in every direction.
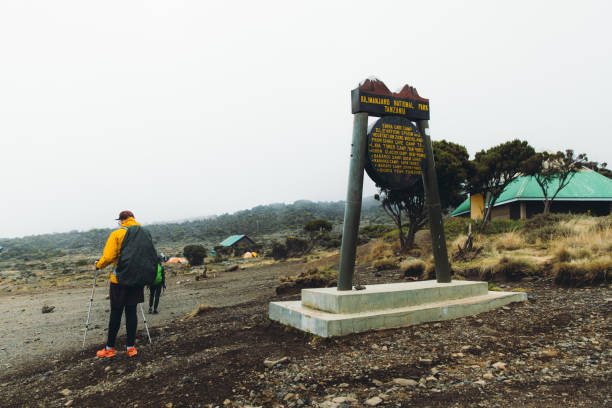
Barafu Camp (4,673m)
Elevation: 4,673m
Terrain: Rocky, exposed ridge
Facilities: Tent platform, basic toilets
Water: No water — carry from Karanga
Summit base camp. Barren, windy, and cold — rest is essential before the midnight ascent to Uhuru Peak.
Understanding Altitude on the Lemosho Route
Altitude sickness is the biggest challenge. Knowledge is your best defence.
Altitude sickness (AMS) affects nearly everyone above 3,000m to some degree. The Lemosho Route's 7-8 day itinerary gives you more time to acclimatize than shorter routes, which is why its success rate is the highest on the mountain. The "climb high, sleep low" strategy on Day 3 (acclimatization hike to 4,100m before sleeping at 3,850m) and Day 4 (Lava Tower at 4,630m before descending to 3,960m) is key to preparing your body for the summit. Symptoms include headache, nausea, dizziness, and fatigue. Prevention is everything — climb slowly, stay hydrated, eat well, and listen to your guide.
Pole pole (slowly slowly in Swahili) is the golden rule. Your guides are trained to recognize early signs of altitude sickness and will make critical decisions about whether it's safe for you to continue. Trust their judgment — they have your safety as their top priority.
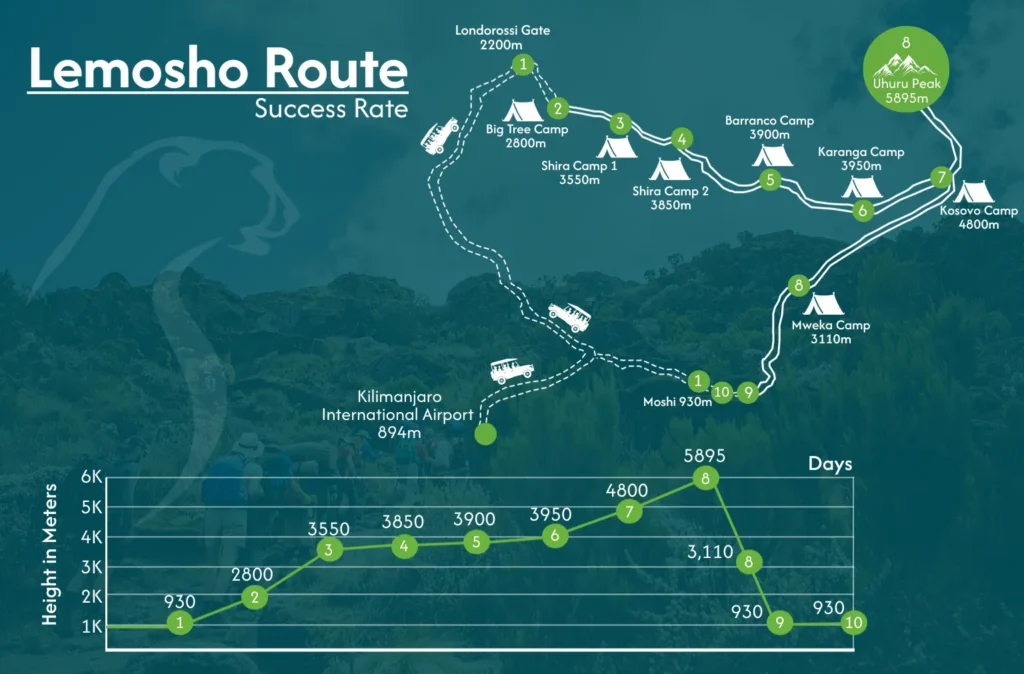
Lemosho Route Map & Trail Overview
Visualise the entire Lemosho Route from start to summit and down via Mweka.
How Hard Is the Lemosho Route?
The Lemosho Route is rated as challenging but achievable for anyone with good fitness and determination. The trail includes steep sections like the Barranco Wall (a non-technical scramble), longer daily distances (up to 11 km), and camping at high altitude. Summit night is the ultimate test — 6-7 hours of uphill climbing in freezing temperatures at extreme altitude.
Who can climb? Active individuals with good cardiovascular fitness and some hiking experience are best suited for the Lemosho Route. You should be comfortable walking 4-8 hours a day over varied terrain, including some steep sections. Previous high-altitude experience is helpful but not essential — what matters most is your body's response to altitude, which is impossible to predict before you go.
Training recommendation: Start preparing 2-3 months before your climb. Focus on cardiovascular fitness (hiking, running, cycling, stairs) and leg strength (squats, lunges). Practice hiking with a loaded daypack on varied terrain. The Barranco Wall scramble can be simulated with steep hill climbs. Don't underestimate mental preparation — summit night will push you beyond where you thought your limits were.
Lemosho Route Summit Success Rate
The Lemosho Route boasts the highest summit success rate of any Kilimanjaro route at 90-95% overall. The 8-day itinerary achieves success rates exceeding 95%, making it the safest bet for reaching the Roof of Africa. This is thanks to the longer itinerary (more time for acclimatization) and the route's excellent "climb high, sleep low" profile.
At Kizza Adventures, we run the full 8-day itinerary with proper acclimatization protocols, experienced guides trained in altitude sickness recognition, careful health monitoring with pulse oximeters at every stage, and a policy of never rushing climbers. We publish honest industry ranges — not invented house records — because no operator can guarantee any individual summit.
Expert tip: The key to success on Lemosho is choosing the 8-day option.
| Itinerary | Typical Operator-Reported Success | Why |
|---|---|---|
| 6-Day Lemosho | 80–85% | Fastest legal schedule; only for pre-acclimatized, experienced trekkers |
| 7-Day Lemosho | 85–90% | The standard; solid profile for fit first-timers |
| 8-Day Lemosho | 90–95% | Extra day, best acclimatization, highest odds — our pick for beginners |
Ranges compiled from published operator data across the industry, not Kizza house records and not a promise for any individual climb. Fitness, pacing, hydration and luck all count. The extra day makes a significant difference in your body's ability to adapt to altitude. Trust the itinerary, follow your guide's advice, and maintain a consistent intake of water and food throughout each day.
When Should You Climb the Lemosho Route?
The best time to climb the Lemosho Route is during the dry seasons: June to October and January to March. These months offer the best weather conditions with clear skies, minimal rainfall, and the highest summit success rates.
June-October: This is the peak climbing season. Expect clear skies, excellent visibility, and colder summit nights. The trails are busy but the conditions are most reliable. Daytime temperatures at lower elevations are pleasant (15-25°C) while summit night temperatures drop to -15°C to -25°C.
January-March: The second dry season. Generally good conditions with slightly warmer temperatures. January and February are particularly popular. The mountain is less crowded than June-October.
April-May & November: The rainy seasons. Heavy rainfall makes trails slippery and muddy, clouds obscure the views, and summit success rates drop significantly. We do not recommend climbing during these months.
Ultimate Kilimanjaro Packing List
Everything you need to reach Uhuru Peak — download our free comprehensive packing guide.
Proper packing can mean the difference between a successful summit and a struggle. Kilimanjaro takes you through five climate zones — from warm rainforest at the base to freezing Arctic conditions at 5,895m. Our expert guides have created a complete packing checklist covering every layer, piece of gear, and essential item you'll need.
At Kizza Adventures, we review every climber's gear before departure to maximise safety and summit success.
View Full Packing ListPrintable page — open, then print or save as PDF.
How Much Does the Lemosho Route Cost?
The cost of climbing Kilimanjaro via the Lemosho Route with fixed per-person rates: 7-Day Private $2,000 · 8-Day Private $2,250 · 7-Day Luxury $2,800 · 8-Day Luxury $3,000 · 7-Day Group Join $1,750 · 8-Day Group Join $1,900. Every rate is per person. At Kizza Adventures, we offer transparent pricing with no hidden fees.
| Package | Price (USD) | Details |
|---|---|---|
| Private Lemosho Route — your own guide and crew | ||
| 7-Day Private Lemosho Route | $2,000 | Per person |
| 8-Day Private Lemosho Route | $2,250 | Per person |
| Luxury Lemosho Route — premium camps, hotels and service | ||
| 7-Day Luxury Lemosho Route | $2,800 | Per person |
| 8-Day Luxury Lemosho Route | $3,000 | Per person |
| Group Join Lemosho Route — join fellow climbers | ||
| 7-Day Group Join Lemosho Route | $1,750 | Per person |
| 8-Day Group Join Lemosho Route | $1,900 | Per person |
| Park entrance fees | $200-300 | Included in package |
| Guide fees | $200-350 | Professional, certified guide |
| Porter fees | $150-250 | 1 porter per 2 climbers minimum |
| Camping fees | $200-300 | Per night at each camp |
| Meals on mountain | $150-250 | 3 meals + snacks daily |
| Transport (Moshi ↔ Gate) | $50-80 | Round trip transfer |
| Equipment rental | $100-250 | Tent, sleeping bag, poles, etc. |
| Tips (guides + porters) | $200-400 | Recommended, not mandatory |
| Travel insurance | $50-100 | Must cover high-altitude trekking |
Why prices vary: Group discounts are available for parties of 4+. Peak season (June-Oct) commands higher prices. Luxury add-ons like private guides, premium equipment, and extra porters increase costs. Always check what's included before booking — we pride ourselves on all-inclusive transparency.
Lemosho vs Other Kilimanjaro Routes
How does the Lemosho Route compare to Kilimanjaro's other climbing routes?
| Feature | Lemosho | Marangu | Machame | Rongai | Northern Circuit | Umbwe |
|---|---|---|---|---|---|---|
| ★ Our Pick | Best Overall | Easiest | Scenic | Remote | Longest | Toughest |
| Difficulty | Challenging | Moderate | Challenging | Moderate | Moderate-Challenging | Very Challenging |
| Days | 7-8 | 5-6 | 6-7 | 6-7 | 8-9 | 5-7 |
| Scenery | Excellent | Good | Excellent | Good | Excellent | Excellent |
| Success Rate | 90-95% | 75-85% | 85-90% | 80-85% | 95%+ | 70-80% |
| Crowds | Moderate | High | High | Low | Low | Low |
| Accommodation | Camping | Huts | Camping | Camping | Camping | Camping |
| Price Range | $1,750-3,000 | $1,650-2,200 | $2,100-2,750 | $1,900-2,500 | $2,500-3,500 | $1,800-2,500 |
| Our Recommendation | Best overall | Beginners | Best value | Rainy season | Max success | Experienced only |
Lemosho Route Photo Gallery
Lemosho Route Price Calculator
Pick your package and climbers — every rate below is per person, exactly as quoted by our team.
Total = per-person rate × number of climbers. No hidden fees. Your fixed written quote — with dates, group size and inclusions — is confirmed on booking.
Climbing Cost Includes
Everything below is covered in your Lemosho package — the price you see is the climb you get.
All Park Fees
Kilimanjaro National Park entry, camping, conservation and rescue fees are fully covered in your package — these government charges make up a large share of any Kilimanjaro price and are the reason genuine climbs never cost a few hundred dollars. No gate surprises, ever.
Camping Fees & Arrangements
Designated campsites at Mti Mkubwa, Shira, Barranco, Karanga, Barafu and Mweka with quality tents pitched, arranged and struck by the mountain crew every day — plus a dining mess tent, sleeping mats and hot washing water at every camp.
Guides, Cook & Porters
Licensed English-speaking guides with Wilderness First Responder training, a mountain cook and a full crew of porters, waiters and camp managers. Porters carry tents, food and your duffel (weight limits briefed before departure) so you carry only a light daypack — and the crew's twice-daily health checks watch over you and your porters alike.
All Meals + Treated Water
Breakfast, lunch and dinner freshly prepared by our mountain cook — porridge and eggs at dawn, hot lunches on the trail, soups, stews and fresh fruit at night — plus treated safe drinking water all day, every day. Vegetarian, vegan, gluten-free and lactose-free plans cost nothing extra when you tell us at booking; expect 4+ litres a day at altitude.
All Transfers
Hotel to Londorossi Gate and back from Mweka Gate, with Kilimanjaro airport transfers on packages that include them — met on arrival by an English-speaking driver, confirmed with your booking.
Rescue Fee & Mountain Safety
Park rescue fees covered and genuine mountain safety on every climb: twice-daily medical check-ups with pulse oximeters, conservative descent decisions at the first warning signs, and evacuation support to Moshi hospital care if ever needed. Safety calls are the guide's alone — never a vote.
First-Aid Kit & Emergency Oxygen
A complete group medical kit on every climb — wound care, blister treatment, pain relief, altitude-sickness medication, splints and bandages — plus bottled emergency oxygen carried for genuine emergencies and administered at the first warning signs, not as a last resort.
Portable Toilet
A private portable toilet tent with a chemical toilet, set up at each camp away from sleeping tents and serviced daily by the crew — included on climbing packages that state it, confirmed with your booking.
Summit Certificate
Your official Kilimanjaro summit certificate — gold for Uhuru Peak, green for Stella Point and Gilman's Point — presented at Mweka Gate and a free lifetime souvenir of the roof of Africa.
Hotel Nights
Comfortable Moshi hotel stays with breakfast before and after the trek on packages that include them — hot shower, real bed, gear store and briefing room waiting at the bottom. Extra nights easily added.
Briefing & Support
Full pre-climb briefing the evening before — gear inspection item by item, route and weather review, health forms and emergency contacts — plus a team on call from booking to certificate, and free gear advice any time before you fly.
Climbing Cost Excludes
Honest extras to budget for — nothing hidden, nothing surprising at the gate.
International Flights
Flights to and from Kilimanjaro International Airport are not included.
Tanzania Visa Fees
Visa costs are paid by the traveller; e-visa available online in advance.
Travel Insurance
Mandatory high-altitude cover is not included — it must cover rescue up to 6,000 m.
Personal Equipment
Sleeping bag, poles and personal layers are not included — quality rental available in Moshi.
Crew Tips
Tips for guides, cook and porters are not included but warmly recommended.
Laundry Service
Laundry on the mountain and at hotels stays yours.
Alcoholic & Soft Drinks
Alcoholic drinks and hotel soft drinks are excluded — altitude and alcohol do not mix.
Personal Expenses
Souvenirs, extra nights and anything of a personal nature stay yours.
Join a Lemosho Group Climb
Share the trail, the costs and the summit sunrise — group departures run in every season.
How group joining works
Tell us your dates and we match you with fellow climbers on the same Lemosho itinerary — same route, same professional crew, shared costs. Solo travellers welcome; you will never be forced into a date that does not suit you.
Group size, departure grouping and your guide team are confirmed in writing at booking — never assumed on this page.
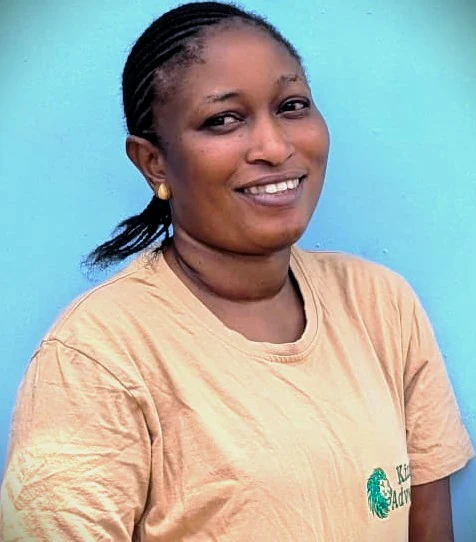
Want to plan a memorable Tanzanian adventure? Message Maghret directly — Lemosho dates, group sizes, prices and preparation, answered fast by someone who plans these climbs every day.
Chat on WhatsAppWhat Lemosho Climbers Say About Kizza Adventures
Real words from real Lemosho summits — verified reviews from our climbers. Read them all on our TripAdvisor page.
Verified TripAdvisor rating
“My 7-day Lemosho route Kilimanjaro climbing tour with Kizza Adventures was an exceptional experience from start to finish. The professionalism and expertise of the guides and porters were outstanding, ensuring our safety and comfort throughout the journey.”
“My travel to Tanzania with kizza adventure was very nice, the mount Kilimanjaro 7days lemosho route. I successfully rich to the top of Kilimanjaro 2024. My guide was very humanity and humble. My itenary also was arranged very well.”
Lemosho Route — Frequently Asked Questions
Everything you need to know before you go.
The 8-day itinerary provides an additional day on the mountain, giving climbers more time to adjust to the altitude and potentially improving their chances of reaching Uhuru Peak. At Kizza Adventures, we encourage guests to choose an itinerary that allows sufficient acclimatization, follow their guides' instructions, maintain a steady walking pace, and prioritize safety throughout the climb.
At Kizza Adventures, we help beginners prepare by explaining the daily trekking schedule, recommending suitable training, providing a packing list, and helping them choose between the 7-day and 8-day itineraries. For many first-time climbers, the 8-day option is particularly attractive because it offers more time on the mountain. Although no itinerary can guarantee summit success, appropriate preparation can help you approach the adventure with greater confidence.
Both itineraries offer magnificent scenery, experienced mountain support when properly arranged, and an opportunity to attempt the summit of Kilimanjaro. At Kizza Adventures, we help you compare the walking distances, camping locations, daily elevation changes, and package prices before booking. Our goal is to help you select the itinerary that best matches your needs rather than simply choosing the shortest option.
At Kizza Adventures, we help make the experience more manageable through preparation advice, gradual pacing, planned rest breaks, and guidance from the mountain team. Regular walking, hiking, stair climbing, and aerobic exercise before your trip can help build endurance. Choosing the 8-day itinerary may also provide more time for acclimatization, although altitude-related problems remain possible on either itinerary.
The journey takes you through rainforest, moorland, the Shira Plateau, alpine desert, and the high-altitude landscape approaching the summit. At Kizza Adventures, we recommend reviewing the detailed itinerary before departure so you understand the expected walking time, distance, and elevation gain for each day. This information also helps you prepare physically and decide whether the 7-day or 8-day schedule suits you better.
The summit attempt usually begins during the night, allowing climbers to progress toward the peak before descending to a lower camp. The timing and pace depend on weather conditions, the group's progress, and individual well-being. At Kizza Adventures, our aim is to help guests prepare for this important stage with appropriate clothing, equipment, hydration, and guidance while making safety the priority throughout the journey.
The 8-day itinerary generally provides more time on the mountain than the 7-day version, which can be beneficial for altitude adaptation. At Kizza Adventures, we encourage climbers to walk slowly, drink fluids regularly, eat adequately, and communicate any symptoms to their guides. Good acclimatization practices can reduce risk but cannot eliminate altitude sickness, and serious symptoms require prompt assessment and descent when necessary.
January to March can offer quieter trails and opportunities to see snow near the summit, while June to October is a popular period for mountain trekking. At Kizza Adventures, we help guests consider their preferred travel dates, available time, and weather expectations when planning their climb.
At Kizza Adventures, we explain the camping arrangements and the equipment included in your particular package before departure. Climbers should also confirm whether sleeping bags, sleeping mats, and other personal equipment are provided or available to rent. Understanding these details in advance helps you pack appropriately and feel more comfortable about what to expect during your nights on the mountain.
At Kizza Adventures, we encourage guests to inform us about dietary requirements, including vegetarian, vegan, and food-allergy considerations, before the climb. This allows the team to discuss suitable arrangements in advance. Bringing personal snacks that you enjoy can also be useful, especially during longer walking days and the summit attempt, when maintaining energy and eating regularly can be challenging.
At Kizza Adventures, we recommend starting training well before your departure. Regular walks, longer weekend hikes, stair climbing, and aerobic exercises are useful ways to build endurance gradually. Practising with a light daypack and suitable hiking boots can also help you become familiar with your equipment. Our preparation guidance can help you approach the mountain with realistic expectations and greater confidence.
At Kizza Adventures, we encourage climbers to move carefully, follow their guides' instructions, and concentrate on secure footing instead of speed. The guides can help explain where to place your hands and feet and how to move through the steeper sections. Taking your time and remaining focused can make the experience more manageable while allowing you to appreciate the remarkable views along the route.
At Kizza Adventures, we help guests prepare for this stage by explaining the schedule and recommending warm clothing, waterproof layers, a headlamp, suitable gloves, water, and accessible snacks. Your guides monitor the group's progress and well-being throughout the attempt. The priority is to make sensible decisions based on individual condition and mountain conditions, while supporting each climber's goal of reaching the summit whenever it is safe to continue.
At Kizza Adventures, we can provide a detailed packing list and explain which items are included in your package and which may be available for hire. It is important to confirm sleeping equipment, luggage weight limits, and any rental arrangements before travelling. Preparing your equipment in advance helps you avoid unnecessary purchases and ensures you are better equipped for the different environments encountered along the Lemosho Route.
The price difference generally reflects additional park and camping fees, meals, crew support, and other itinerary-related expenses. At Kizza Adventures, we recommend comparing the full inclusions of both packages rather than looking only at the initial price. If your schedule allows, the 8-day option is worth considering, particularly if you are a first-time climber or prefer a more gradual approach to high altitude.
At Kizza Adventures, we recommend reviewing the written itinerary and package terms carefully. Ask whether airport transfers, hotel nights before or after the climb, drinking water, equipment rental, and other services are included. Personal expenses, tips, travel insurance, and certain equipment costs may be excluded. Clear information before departure helps you plan your budget accurately and enjoy a more organized climbing experience.
At Kizza Adventures, we can help you explore the available departure dates, group arrangements, and costs associated with your preferred itinerary. Solo travellers should also ask about any single-person supplements or minimum group requirements that may apply. Whether you travel alone or with companions, the key is to choose an arrangement that suits your preferences and provides the appropriate guiding and mountain support.
At Kizza Adventures, we encourage guests to appreciate the entire mountain experience, from the rainforest and Shira Plateau to the high-altitude landscapes and the camaraderie of the trekking team. Summit outcomes cannot be guaranteed, and altitude symptoms, exhaustion, or weather can affect anyone. By following your guides' instructions, communicating how you feel, and preparing properly, you can give yourself a better opportunity to enjoy the journey responsibly.
At Kizza Adventures, we recommend comparing the actual day-by-day itineraries before deciding. Look at each campsite, the expected walking duration, daily elevation changes, and the schedule leading to summit night. This will help you understand how the extra day is used and whether the shorter or longer itinerary is better suited to your fitness, available holiday time, and personal preferences.
We encourage every prospective climber to ask questions and make an informed decision before booking. Kizza Adventures should demonstrate its experience through accurate company information, transparent pricing, genuine guest feedback, and clearly explained climbing arrangements. Our aim is to help you prepare for a rewarding Kilimanjaro adventure with realistic expectations, thoughtful planning, and a focus on responsible mountain trekking.
Planning Your Tanzania Adventure
Everything you need to prepare for your Kilimanjaro climb and Tanzania trip.
Ready to plan your next adventure?
Tell us your ideas, and we’ll craft a personalized travel itinerary and reply within short time.
Ready to Climb the Lemosho Route?
Speak with a local Kilimanjaro expert today. Get a free, custom itinerary in under 24 hours.