


Kilimanjaro Shira Route Overview — The Best Complete Guide to Climbing Mount Kilimanjaro
The complete Shira Route guide — Kilimanjaro’s high western approach, driving past the rainforest to a 3,400–3,600 m trailhead, then crossing the Shira Plateau to join the southern circuit at Barranco via Lava Tower. Compare 6-day vs 7-day itineraries, difficulty for beginners, the high-start challenge, success factors, altitude and acclimatization, cost, best time to climb, maps, expert tips and booking advice for Uhuru Peak (5,895 m).
What is the Shira Route?
The Shira Route approaches Mount Kilimanjaro from the west — but unlike every other camping route, it skips the rainforest entirely. After registration at Londorossi Gate you drive up a mountain track to a trailhead at 3,400–3,600 m, pull on your boots, and start trekking across the vast Shira Plateau with Kibo towering ahead. From Shira 2 the route joins the southern circuit — Lava Tower, Barranco, Karanga, Barafu — and finishes with the same midnight summit push to Uhuru Peak and descent via Mweka.
The prize is a quiet, spectacular start: open moorland, giant groundsels, huge skies and almost no other trekkers for the first days. The price is altitude from hour one — day one sleeps as high as other routes reach on day three. That single fact shapes every decision on this page, from itinerary length to who should choose Shira at all.
Shira suits trekkers who arrive pre-acclimatized or take 8 days. At Kizza Adventures we recommend the 8-day itinerary wherever available — and if this is your first time above 3,000 m, our honest advice is to compare Lemosho first: same western scenery, but starting low enough for your body to adjust gradually.
Why Choose the Shira Route?
Quietest Start on the Mountain
Shira’s western trailhead sees a fraction of Machame’s traffic. The first days across the plateau feel wild and empty — the peaceful Kilimanjaro experience most trekkers imagine.
Spectacular Plateau Scenery
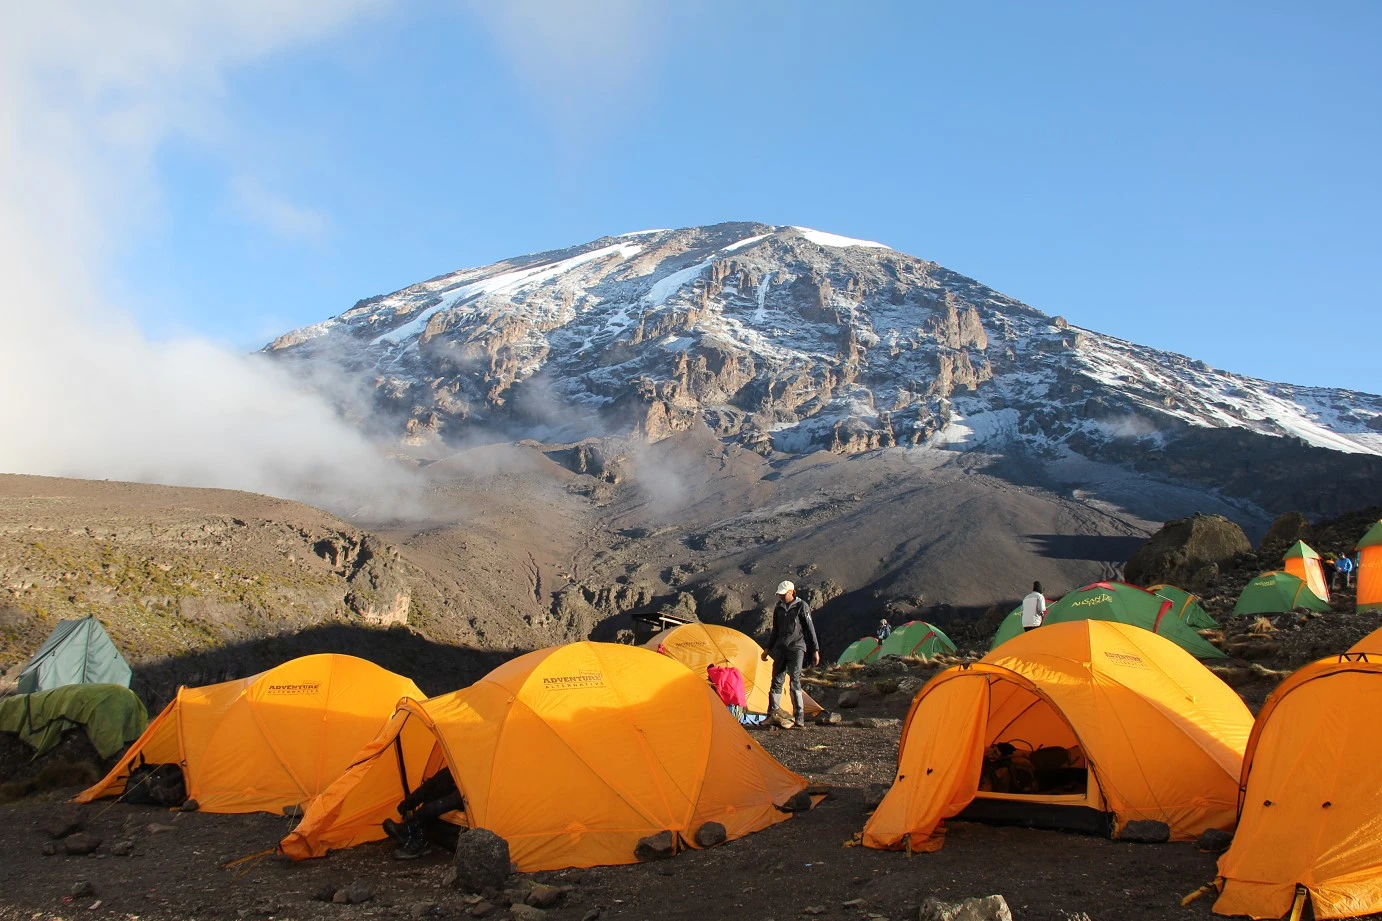
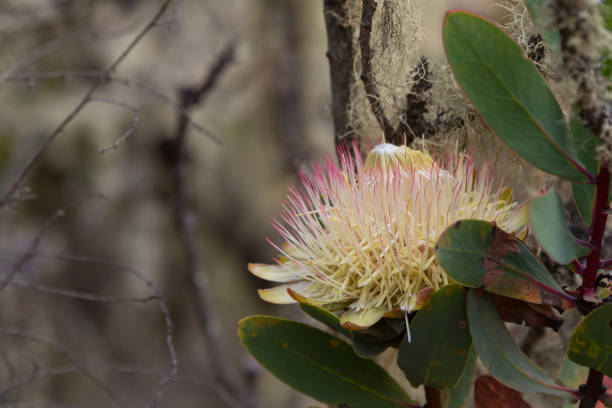
The Shira Plateau — a vast volcanic caldera floor of moorland and giant groundsels beneath Kibo’s glaciers — is unlike anything on the southern routes, and you get two full days of it.
No Rainforest Mud
Driving past the forest means skipping the muddiest, slipperiest trail on the mountain — a genuine comfort advantage in the rainy seasons and for anyone with knee trouble.
Joins the Best Southern Circuit
From Shira 2 onward you inherit the classic high route: Lava Tower acclimatization, the Barranco Wall, Karanga and Barafu — the strongest finish of any itinerary.
High Start Punishes the Unacclimatized
Day one at 3,400–3,600 m with sea-level lungs is the route’s defining risk — headaches on night one are common. Pre-acclimatize (Meru, Kenya, Rwenzori) or take 8 days.
Shorter Margin for Error
With 6-day options on sale, Shira is easy to under-book. The 6-day schedule compresses an already demanding profile — 7 days minimum for most, 8 for first-timers at altitude.
Complete Shira Route Overview
Our Guides' Verdict on the Shira Route
Straight talk from the team that climbs it every month — which length to book, and who should skip the short one.
1,600+ climbers guided on Kilimanjaro
Shira is the route our guides recommend with one condition attached: respect the high start. The drive to 3,500 m on day one is wonderful and dangerous in equal measure — wonderful for scenery, dangerous for sea-level lungs. Pre-acclimatize first, or take 8 days and let the mountain come to you.
- Book 8 days for your best odds. Extra plateau time plus the Karanga night spreads the high start over enough days for a normal body to catch up — that is what makes summits on Shira.
- 7 days is the honest minimum. Fit trekkers with hill fitness — ideally some nights above 3,000 m beforehand — do well on seven; it keeps the Karanga buffer while the cost stays fair.
- 6 days only if pre-acclimatized. The short schedule compresses a high start AND skips Karanga — strictly for trekkers fresh off high mountains (Meru, Kenya, Rwenzori).
- Enjoy the quiet while it lasts. The plateau is blissfully empty, then Machame and Lemosho traffic joins from Barranco onward — our early starts keep you ahead of the crowds on the Wall and the summit push.
- Rainy season? Shira shines. Skipping the forest skips the worst mud on Kilimanjaro — with good gear, March–May and November climb beautifully and quietly.
- Climb it in the dry months if you can. June–October and January–March give the kindest skies for Barranco Wall photos and summit sunrise.
Climb with a Moshi-based team that briefs you the night before, walks every step with you, checks your health twice daily on the mountain, and meets you at Mweka Gate with your summit certificate. Message us on WhatsApp with your dates and trekking background — we will tell you honestly whether Shira is your route at all — or whether Lemosho 8 days serves you better.
Shira Route — Day-by-Day Itinerary
The full 7-day and 6-day itineraries with hiking times, distances, elevations and camp photos — pick your trek length below. Our guides recommend 8 days where available; of these two, take 7.
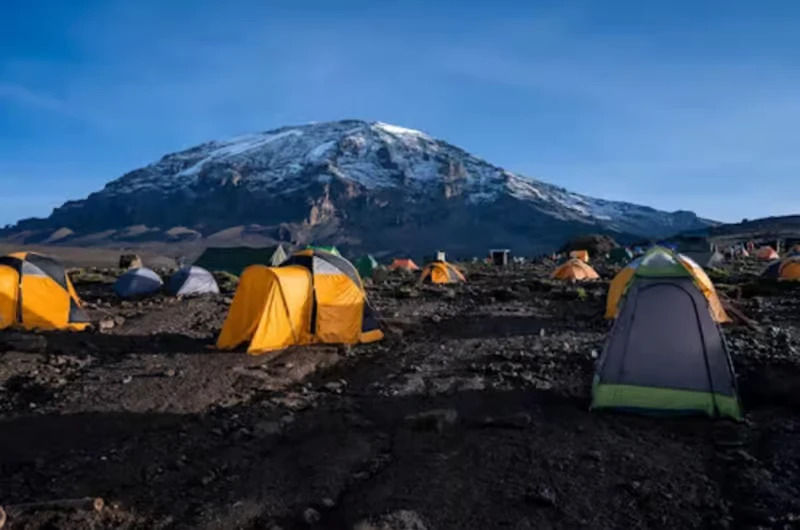
After breakfast you drive to Londorossi Gate (approximately 2,100–2,250 m) on the western side for registration and park entry formalities. After meeting your guides and crew, you begin trekking through beautiful montane forest — fresh air, lush vegetation, possible wildlife — as the trail climbs steadily toward the plateau.
The forest gradually gives way to open moorland with spectacular views of Kibo ahead. After approximately 4–6 hours of hiking (5–8 km depending on the starting trailhead), you arrive at Shira 1 Camp at around 3,500 m. Your guides monitor your acclimatization on arrival — night one already sleeps high.
Relax, enjoy a freshly prepared meal, take in the huge plateau views, and settle in for dinner and overnight at Shira 1 Camp. Distances and timing flex with the trailhead, road conditions and group pace.
- Accommodation: Shira 1 Camp (approx. 3,500 m)
- Meals: Lunch and dinner
- Trekking time: Approximately 4–6 hours
- Trekking distance: Approximately 5–8 km, depending on the starting trailhead
- Altitude: From 2,100–2,250 m to approx. 3,500 m

After breakfast at Shira 1 Camp you continue east across the spectacular plateau — open grasslands, unique high-altitude vegetation, rolling terrain and constant views of Kibo. A relatively gentle hike of approximately 4–5 hours over about 6 km, designed to let you enjoy the scenery while acclimatizing gradually.
Arrive at Shira 2 Camp (3,847 m) for a freshly prepared meal and a restful afternoon staring at the mountain. In the evening your guides brief tomorrow’s Lava Tower day — the first serious altitude — before dinner and overnight at camp.
Drink steadily, eat well, and report any headache early. The plateau’s open terrain gives easy walking but no shelter from wind; layers stay on.
- Accommodation: Shira 2 Camp (3,847 m)
- Meals: Breakfast, lunch, dinner
- Trekking time: 4–5 hours
- Trekking distance: Approximately 6 km
- Altitude: From 3,505 m to 3,847 m

After breakfast you leave Shira 2 and trek across rugged alpine desert toward Lava Tower, climbing through dramatic volcanic landscapes with spectacular Kibo views. At approximately 4,630 m you rest and take lunch near the Tower — weather and guide’s plan permitting — the ‘climb high’ half of the day’s acclimatization bargain.
Then descend the rocky trail to Barranco Camp at approximately 3,976 m, passing giant groundsels and the famous Barranco Wall looming over camp. Six to eight hours and about 11 km in total. From here Shira merges with the Machame and Lemosho trails and camps get busier.
Relax, enjoy a warm meal, admire the valley and the Wall — tomorrow you climb it. Overnight at Barranco Camp.
- Accommodation: Barranco Camp (approx. 3,976 m)
- Meals: Breakfast, lunch, dinner
- Trekking time: 6–8 hours
- Trekking distance: Approximately 11 km
- Altitude: Up to 4,630 m at Lava Tower; sleep at approx. 3,976 m
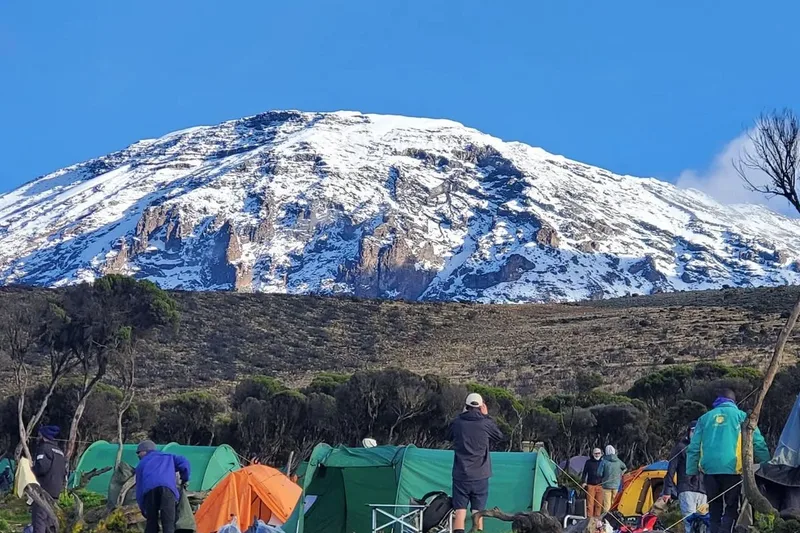
After breakfast you climb the famous Barranco Wall — rocky, exciting, memorable — navigating carefully with the crew while valleys and Kibo’s glaciers open behind you. Over the top, the trail rolls across ridges and valleys through rugged alpine desert toward Karanga Valley.
After approximately 4–5 hours and about 5 km you arrive at Karanga Camp (4,034 m) for a freshly prepared meal, rest and rehydration. This stage buys valuable acclimatization time before Barafu, the base camp for the summit attempt.
Dinner and overnight at Karanga Camp. Short day, big purpose.
- Accommodation: Karanga Camp (4,034 m)
- Meals: Breakfast, lunch, dinner
- Trekking time: 4–5 hours
- Trekking distance: Approximately 5 km
- Altitude: From 3,976 m to 4,034 m
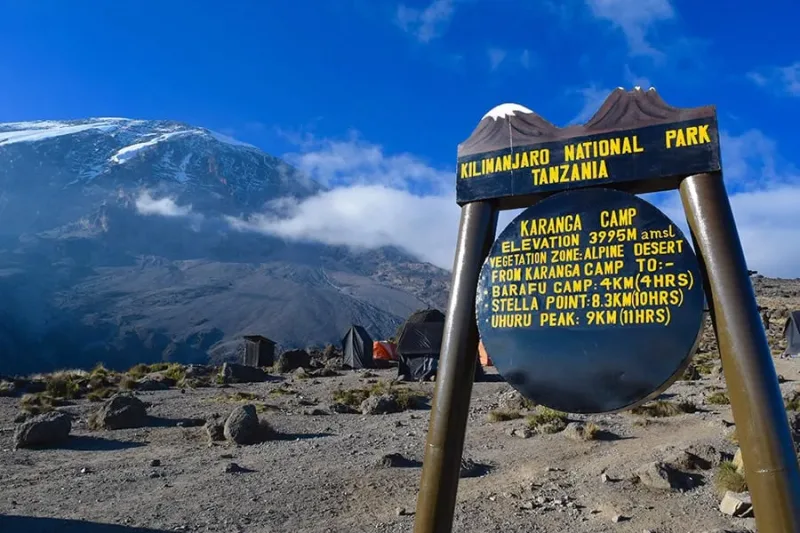
After breakfast you leave Karanga and climb steadily over rocky terrain toward Barafu, with impressive views of Kibo and the surrounding slopes. Short breaks to rest, hydrate and absorb the dramatic high-mountain scenery along the way.
After approximately 4–5 hours and about 4 km you arrive at Barafu Camp (4,673 m). Lunch, rest, and a detailed briefing on the midnight ascent — then an early dinner, equipment check, and precious hours of sleep before the summit push. Overnight at Barafu Camp.
Use the afternoon deliberately: lay out every summit layer, test headlamp batteries, fill water bottles (they ride inside your jacket tonight to stop freezing), and eat even if the altitude has stolen your appetite. Barafu is no place for faffing at 11 pm — preparation now is sleep later.
- Accommodation: Barafu Camp (4,673 m)
- Meals: Breakfast, lunch, dinner
- Trekking time: 4–5 hours
- Trekking distance: Approximately 4 km
- Altitude: From 4,034 m to 4,673 m

Around midnight, after breakfast at Barafu, you begin the summit attempt under starry skies — slowly up steep, rocky trails through freezing darkness toward Stella Point on the crater rim. As dawn approaches you push on to Uhuru Peak (5,895 m) (5,895 m), celebrating beside the iconic sign above glaciers and the African plains far below.
After a short summit stay you descend to Barafu for rest and refreshments, then continue down through alpine desert and moorland toward Mweka Camp (3,068 m) — about 15.5 km and 12–15 hours in total, the longest and greatest day of the trek.
Dinner and overnight at Mweka Camp. Summit certificates (gold for Uhuru, green for Stella/Gilman’s) are issued at the gate tomorrow.
- Accommodation: Mweka Camp (3,068 m)
- Meals: Breakfast, lunch, dinner
- Trekking time: Approximately 12–15 hours
- Trekking distance: Approximately 15.5 km
- Altitude: Uhuru Peak 5,895 m; sleep at 3,068 m
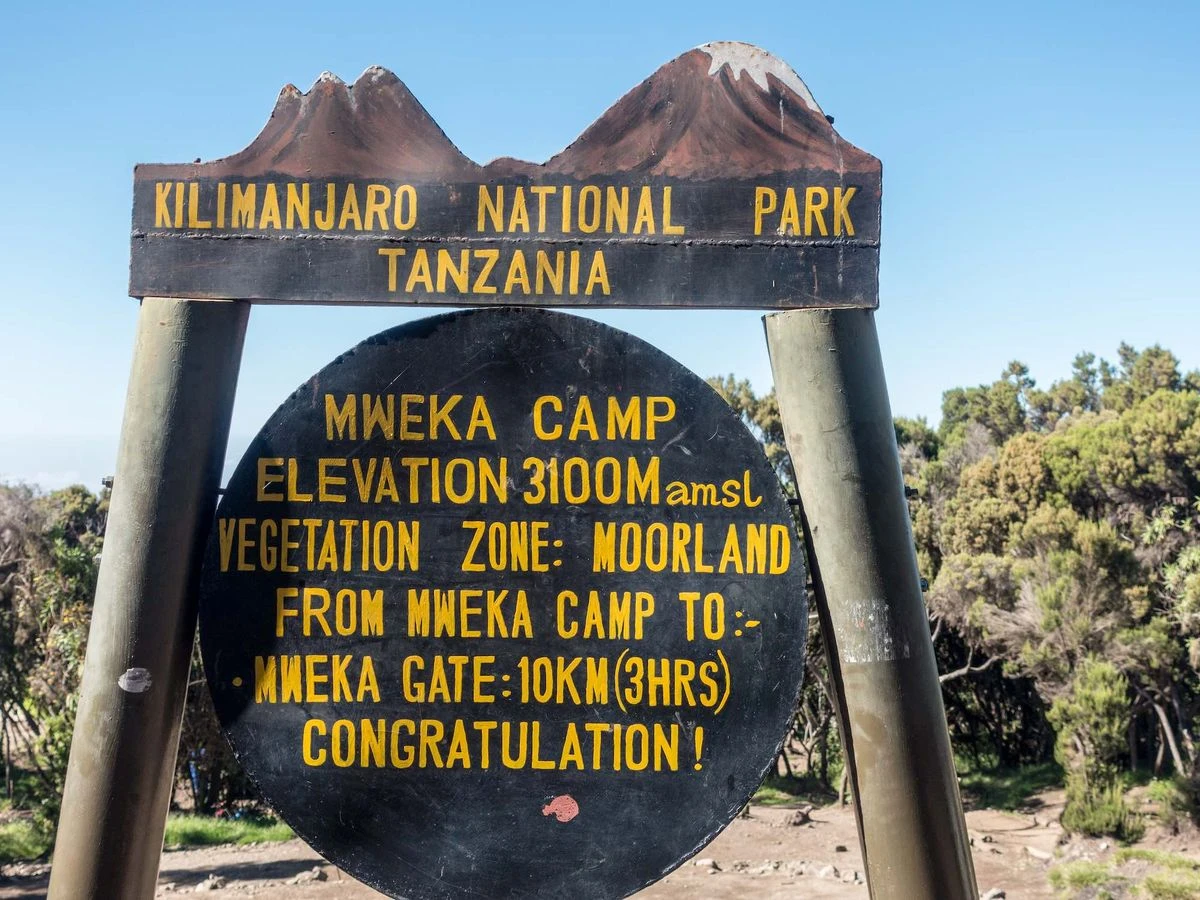
After breakfast you descend through lush montane rainforest — dense vegetation, towering trees, birdsong — as the air warms and thickens with every step. After approximately 3–4 hours and about 10 km you reach Mweka Gate (1,640 m).
Complete the park formalities, receive your Kilimanjaro climbing certificate, and say farewell to your guides and crew before meeting your driver for the transfer to Moshi or Arusha. Keep one buffer night before any flight or safari.
End of an unforgettable seven days on the Shira Route — celebrate it properly.
- Accommodation: Moshi/Arusha hotel
- Meals: Breakfast and lunch
- Trekking time: 3–4 hours
- Trekking distance: Approximately 10 km
- Altitude: From 3,068 m to 1,640 m
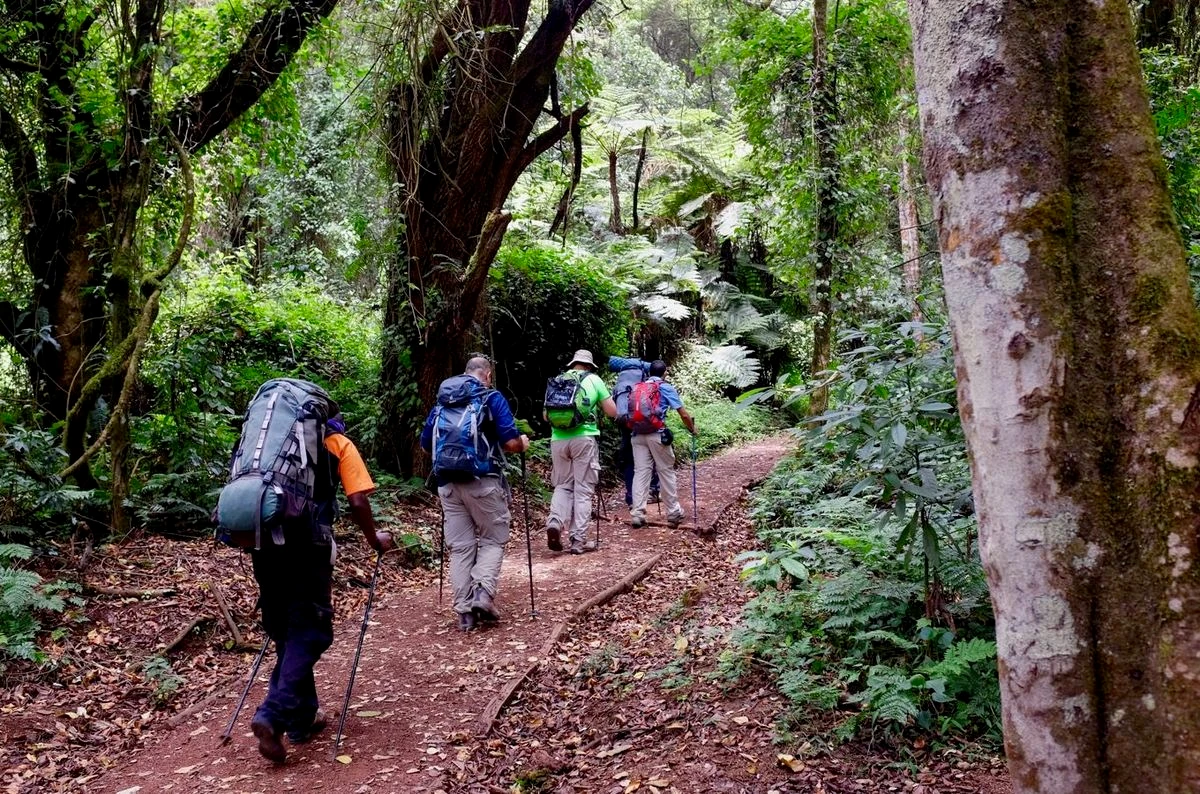
Shira Route Campsites
The Shira Route is a camping-only route — no huts. Here are the campsites you’ll sleep at.
Shira 1 Camp (3,500 m)
Elevation: 3,500 m
Terrain: Open moorland plateau
Facilities: Tent platforms, basic toilets
Water: Stream water (treated)
On the plateau edge with Kibo dead ahead. Used as night one on itineraries that skip Simba — a bold sleep at altitude straight off the vehicle.
Shira 2 Camp (3,847 m)
Elevation: 3,847 m
Terrain: Open moorland plateau
Facilities: Tent platforms, basic toilets
Water: Stream water (treated)
Big-sky camp on the plateau’s eastern edge — the last quiet night before joining the southern-circuit traffic.
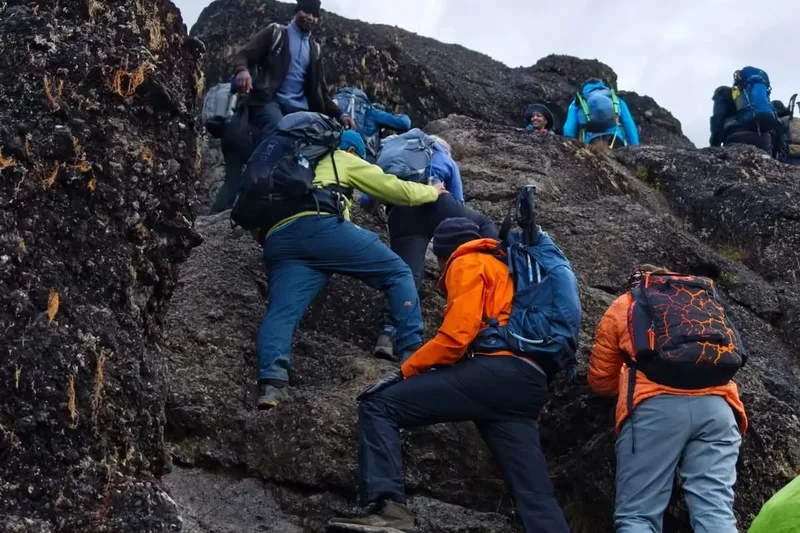
Barranco Camp (3,976 m)
Elevation: 3,976 m
Terrain: Sheltered valley
Facilities: Tent platforms, basic toilets
Water: Stream water (treated)
In a lush valley under the Barranco Wall, ringed by giant groundsels. Most climbers’ favourite camp on Kilimanjaro.
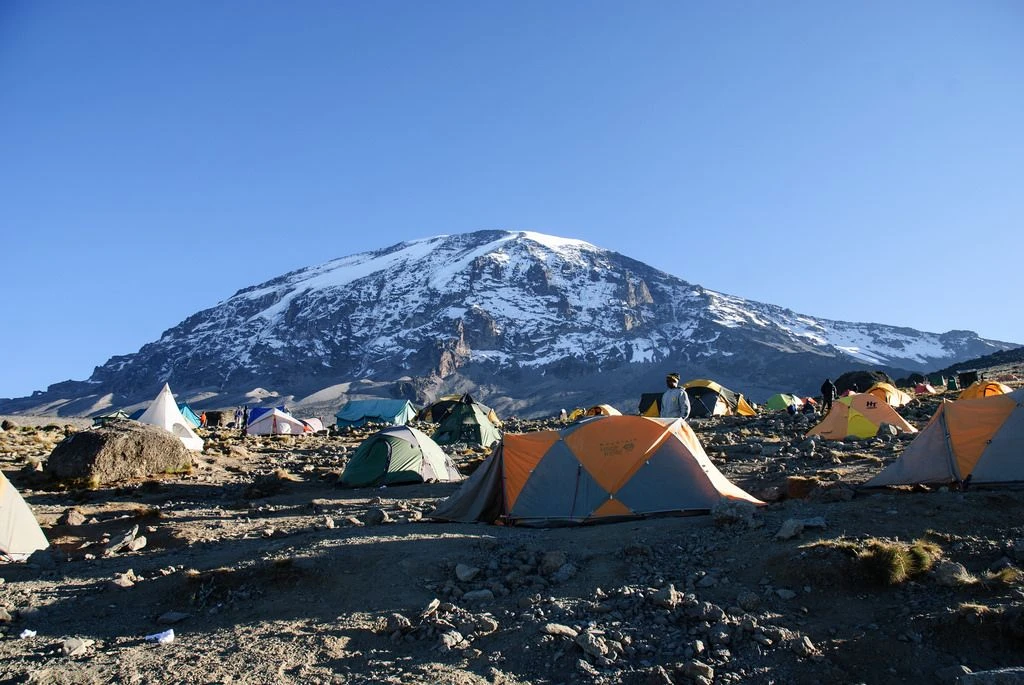
Karanga Camp (4,034 m)
Elevation: 4,034 m
Terrain: Rocky ridge
Facilities: Tent platforms, basic toilets
Water: Last reliable water point
The consolidation night that makes the 7-day itinerary — small, stark and perfectly placed. Water carried from here supplies Barafu.
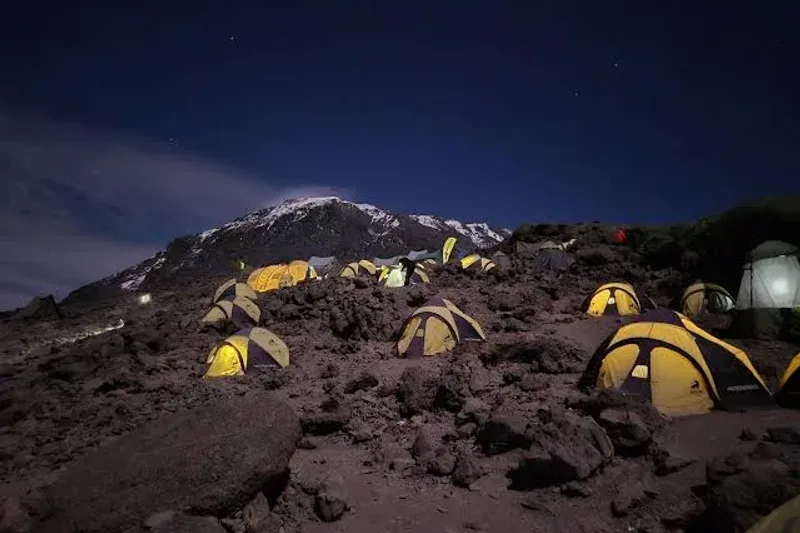
Barafu Camp (4,673 m)
Elevation: 4,673 m
Terrain: Rocky, exposed saddle
Facilities: Tent platforms, basic toilets
Water: No water — carried from Karanga
Summit base camp: barren, windy and cold. Rest is the only job here before the midnight ascent.
Mweka Camp (3,068 m)
Elevation: 3,068 m
Terrain: Upper forest clearing
Facilities: Tent platforms, basic toilets
Water: Stream water (treated)
The celebration camp after summit day — back in the forest, breathing thick air, sleeping the deepest sleep of the trek.
Understanding Altitude on the Shira Route
Starting at 3,400–3,600 m is the whole story. Knowledge is your best defence.
Altitude sickness (AMS) can begin on day one of the Shira Route — no other standard route starts this high. The vehicle transfer to 3,400–3,600 m skips the gradual warm-up other routes enjoy, so the first 48 hours decide much: walk pole pole, drink 4+ litres daily, eat even when appetite fades, and report headaches immediately. From Shira 2 the classic “climb high, sleep low” machinery takes over — Lava Tower by day, Barranco Camp to sleep — plus the Karanga night on the 7-day itinerary.
Pre-acclimatization is the Shira cheat code. Nights above 3,000 m before the climb (Meru, Kenya, Rwenzori — or simply arriving in Moshi early) transform day one from a shock into a stroll. Your guides check health twice daily and make all safety calls; trust their judgment over summit fever, every time.
Shira Route Map & Trail Overview
Visualise the entire Shira Route from the western trailhead to the summit and down via Mweka.
How Hard Is the Shira Route?
The Shira Route is moderately difficult to strenuous — and almost all of that rating comes from the start, not the trail. The walking itself is never technical: open plateau paths, the Barranco Wall scramble (hands needed in short sections), long days of up to 10 km, camping above 3,800 m, and a 10–15-hour summit night in freezing darkness. What makes Shira hard is beginning at 3,400–3,600 m before your body has had a single day to adjust.
Who can climb? Fit, prepared trekkers — ideally with nights above 3,000 m in their legs before arrival. First-timers to high altitude should think carefully: frankly, a lower-starting route (Lemosho) often serves them better. On the 6-day itinerary, arrive pre-acclimatized or choose 7–8 days.
Training recommendation: 2–3 months of cardio (hiking, running, stairs) and leg strength, practice hikes with a loaded daypack — plus, uniquely for Shira, any way to pre-expose yourself to altitude. And mental preparation: summit night will push you beyond where you thought your limits were.
Shira Route Summit Success Factors
At Kizza Adventures, our company summit success rate on the Shira Route is 90% — our own guided-climb record on the 7-day itinerary. Published industry estimates for the route run around 75–80% and vary between operators, but our gradual pacing, high-start briefings and twice-daily health checks lift our climbers above the average. The number trails lower-starting routes for one reason: day one begins at 3,400–3,600 m, and some climbers spend the whole trek paying for that opening shock. Longer itineraries (8 days where available) give the body time to catch up and are worth considering for anyone arriving from sea level.
At Kizza Adventures, we run full itineraries with honest high-start briefings, experienced guides trained in altitude sickness recognition, careful health monitoring at every stage, and a policy of never rushing climbers. We publish estimates — not house records — because no operator can guarantee any individual summit.
Expert tip: Pre-acclimatize before Shira and the odds swing dramatically — the route is entirely different for legs that already know 3,500 m. That preparation plus our guiding is exactly how our company rate holds at 90%.
| Itinerary | Estimated Success | Acclimatization Profile | Who It Suits |
|---|---|---|---|
| 6-Day Shira | Below 7-day* | Compressed — high start, no Karanga night | Pre-acclimatized, experienced trekkers only |
| 7-Day Shira | 90% Kizza rate (75–80% industry*) | Standard — Karanga night included | Fit trekkers, ideally with altitude nights behind them |
| 8-Day Shira | Best odds* | Longest — maximum adjustment time | Our pick for sea-level arrivals; ask for the day-by-day |
*Indicative estimates, not guaranteed results. Fitness, pacing, hydration, weather, pre-acclimatization and individual physiology all decide summits. Trust the itinerary, follow your guide’s advice, and maintain a consistent intake of water and food throughout each day.
When Should You Climb the Shira Route?
The main drier periods — January to early March and June to October — are the most popular windows for Shira, with the best odds of clear plateau views and stable summit weather. But Kilimanjaro’s weather is variable at every elevation: rain, strong wind, cold and even snow can appear in any month.
June–October: Peak season. Clearest skies over the plateau, coldest summit nights, busiest camps from Barranco onward. Book early.
January–March: Warmer and quieter, often superb visibility. A favourite for photographers and anyone avoiding peak crowds.
April–May & November: The rains. Shira has one structural advantage here — driving past the forest skips the worst mud on the mountain — but the plateau is exposed and windy, so wind-proof layers are non-negotiable. No month guarantees clear skies or a summit; prepare for changing conditions throughout.
Ultimate Kilimanjaro Packing List
Everything you need to reach Uhuru Peak — download our free comprehensive packing guide.
Proper packing can mean the difference between a successful summit and a struggle. Kilimanjaro takes you through five climate zones — from warm rainforest at the base to freezing Arctic conditions at 5,895m. Our expert guides have created a complete packing checklist covering every layer, piece of gear, and essential item you'll need.
At Kizza Adventures, we review every climber's gear before departure to maximise safety and summit success.
View Full Packing ListPrintable page — open, then print or save as PDF.
How Much Does the Shira Route Cost?
The cost of climbing Kilimanjaro via the Shira Route with fixed per-person rates: 6-Day Private $2,150 · 7-Day Private $2,300 · 6-Day Luxury $2,600 · 7-Day Luxury $2,900 · 6-Day Group Join $1,800 · 7-Day Group Join $1,900. Every rate is per person. At Kizza Adventures, we offer transparent pricing with no hidden fees.
| Package | Price (USD) | Details |
|---|---|---|
| Private Shira Route — your own guide and crew | ||
| 6-Day Private Shira Route | $2,150 | Per person |
| 7-Day Private Shira Route | $2,300 | Per person |
| Luxury Shira Route — premium service and comfort | ||
| 6-Day Luxury Shira Route | $2,600 | Per person |
| 7-Day Luxury Shira Route | $2,900 | Per person |
| Group Join Shira Route — join fellow climbers | ||
| 6-Day Group Join Shira Route | $1,800 | Per person |
| 7-Day Group Join Shira Route | $1,900 | Per person |
| Park entrance fees | $200-300 | Included in package |
| Guide fees | $200-350 | Professional, certified guide |
| Porter fees | $150-250 | Full crew; you carry only a daypack |
| Camping fees | $200-300 | Per night at each camp |
| Meals on mountain | $150-250 | 3 meals + snacks daily |
| Transport (Moshi ⇆ Gate + 4x4) | $80-150 | Round trip incl. plateau transfer |
| Equipment rental | $100-250 | Sleeping bag, poles, etc. if needed |
| Tips (guides + porters) | $200-400 | Recommended, not mandatory |
| Travel insurance | $50-100 | Must cover high-altitude trekking |
Why prices vary: Group joins share crew and camp costs; parties of 4+ earn private-group discounts; the 4x4 plateau transfer is unique to Shira costing. Luxury packages add premium service and comfort. Always check what’s included before booking — we pride ourselves on honest, transparent pricing — inclusions and exclusions spelled out before you book.
Shira vs Other Kilimanjaro Routes
How does the Shira Route compare to Kilimanjaro’s other climbing routes?
| Feature | Shira | Lemosho | Machame | Marangu | Rongai | Northern Circuit | Umbwe |
|---|---|---|---|---|---|---|---|
| ★ Our Pick | Quietest start | Best overall | Most popular | Easiest | Remote | Longest | Toughest |
| Difficulty | Challenging | Challenging | Challenging | Moderate | Moderate | Moderate-Challenging | Very Challenging |
| Days | 6-8 | 7-8 | 6-7 | 5-6 | 6-7 | 8-9 | 5-7 |
| Scenery | Excellent | Excellent | Excellent | Good | Good | Excellent | Excellent |
| Crowds | Low early | Moderate | High | High | Low | Low | Low |
| Accommodation | Camping | Camping | Camping | Huts | Camping | Camping | Camping |
| Our Recommendation | Pre-acclimatized | Best overall | Best value | Beginners | Rainy season | Max acclimatization | Experienced only |
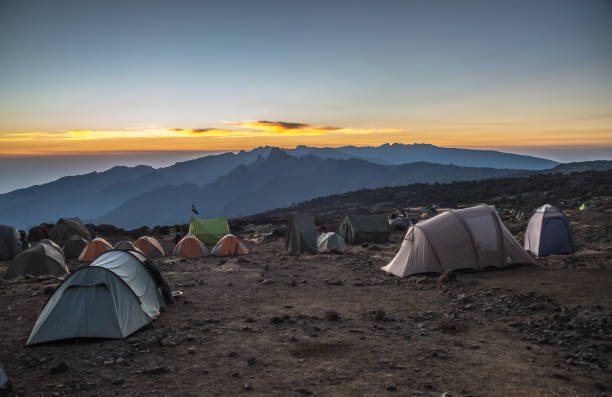
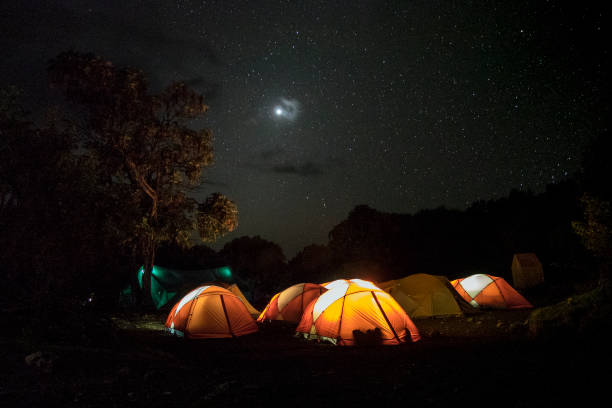
Shira Route Photo Gallery
Shira Route Price Calculator
Pick your package and climbers — every rate below is per person, exactly as quoted by our team.
Estimate only — your exact quote is confirmed in writing at booking. Get exact quote on WhatsApp →
Climbing Cost Includes
Everything below is covered in your Shira package — confirmed with your booking, never assumed on this page.
All Park Fees
Kilimanjaro National Park entry, camping, conservation and rescue fees are fully covered in your package — including government taxes and applicable fees. These charges make up a large share of any Kilimanjaro price and are the reason genuine climbs never cost a few hundred dollars. No gate surprises, ever.
Camping Fees & Arrangements
Designated campsites at Simba/Shira 1, Shira 2, Barranco, Karanga, Barafu and Mweka with quality tents pitched, arranged and struck by the mountain crew every day — plus a dining mess tent, sleeping mats and hot washing water at every camp.
Guides, Cook & Porters
Licensed English-speaking guides with Wilderness First Responder training, a mountain cook and a full crew of porters, waiters and camp managers. Porters carry tents, food and your duffel (weight limits briefed before departure) so you carry only a light daypack — and the crew's twice-daily health checks watch over you and your porters alike.
All Meals + Treated Water
Breakfast, lunch and dinner freshly prepared by our mountain cook — porridge and eggs at dawn, hot lunches on the trail, soups, stews and fresh fruit at night — plus treated safe drinking water all day, every day. Vegetarian, vegan, gluten-free and lactose-free plans cost nothing extra when you tell us at booking; expect 4+ litres a day at altitude.
All Transfers
Hotel to Londorossi Gate and back from Mweka Gate, including the 4x4 plateau transfer, with Kilimanjaro airport transfers on packages that include them — met on arrival by an English-speaking driver, confirmed with your booking.
Rescue Fee & Mountain Safety
Park rescue fees covered and genuine mountain safety on every climb: twice-daily medical check-ups with pulse oximeters, conservative descent decisions at the first warning signs, and evacuation support to Moshi hospital care if ever needed. Safety calls are the guide's alone — never a vote.
First-Aid Kit & Emergency Oxygen
A complete group medical kit on every climb — wound care, blister treatment, pain relief, altitude-sickness medication, splints and bandages — plus bottled emergency oxygen carried for genuine emergencies and administered at the first warning signs, not as a last resort.
Portable Toilet
A portable toilet tent, set up at each camp away from sleeping tents and serviced daily by the crew — confirmed with your booking.
Sleeping Bag
A warm mountain sleeping bag is included in your package — confirmed with your booking. Bring your own if you prefer; proper sleeping equipment matters because temperatures drop considerably at the higher camps.
Summit Certificate
Your official Kilimanjaro summit certificate — gold for Uhuru Peak, green for Stella Point and Gilman's Point — presented at Mweka Gate and a free lifetime souvenir of the roof of Africa.
Hotel Nights
Comfortable Moshi hotel stays with breakfast before and after the trek on packages that include them — hot shower, real bed, gear store and briefing room waiting at the bottom. Extra nights easily added.
Briefing & Support
Full pre-climb briefing the evening before — gear inspection item by item, route and weather review, health forms and emergency contacts — plus a team on call from booking to certificate, and free gear advice any time before you fly.
Climbing Cost Excludes
Honest extras to budget for — nothing hidden, nothing surprising at the gate.
International Flights
Flights to and from Kilimanjaro International Airport are not included.
Tanzania Visa Fees
Visa costs are paid by the traveller; e-visa available online in advance.
Travel & Medical Insurance
Mandatory high-altitude cover is not included — it must cover rescue up to 6,000 m.
Personal Equipment
Personal trekking equipment you bring yourself — boots, layers, poles and accessories — is not included; quality rental is available in Moshi. Sleeping bag is included — see above.
Crew Tips
Tips for guides, cook and porters are not included but warmly recommended.
Laundry Service
Laundry on the mountain and at hotels stays yours.
Alcoholic & Soft Drinks
Alcoholic drinks and hotel soft drinks are excluded — altitude and alcohol do not mix.
Join a Shira Group Climb
Share the trail, the costs and the summit sunrise — group departures run in every season, on 6- and 7-day itineraries.
How group joining works
Tell us your dates and we match you with fellow climbers on the same Shira itinerary — same route, same professional crew, shared costs. Solo travellers welcome; you will never be forced into a date that does not suit you.
Group joins from $1,800 per person (6-day) and $1,900 (7-day). Group size, departure grouping and your guide team are confirmed in writing at booking — never assumed on this page.
Plan With Maghret in Moshi
Real answers, fast, from the team that runs these climbs every week.
Want to plan a memorable Tanzanian adventure? Message Maghret directly — Shira dates, group sizes, prices and preparation, answered fast by someone who plans these climbs every day.
Chat on WhatsAppWhat Shira Climbers Say About Kizza Adventures
Unfiltered words from real Shira summits — read every review on our public profiles below.
TripAdvisor
Photos, summit stories and honest ratings from climbers we guided — the full public record.
Read Reviews on TripAdvisor →Google Reviews
Star ratings and trip reports from our Shira, safari and Zanzibar guests — updated daily.
Read Reviews on Google →Shira Route — Frequently Asked Questions
Everything you need to know before you go.
The Shira Route is a scenic trekking route that approaches Mount Kilimanjaro from the western side. It is known for its expansive landscapes, relatively quiet starting trails, and spectacular views across the Shira Plateau. Unlike routes that begin in the rainforest at a lower elevation, the Shira Route uses a vehicle transfer to reach a high starting point on the mountain before trekking begins.
At Kizza Adventures, we recommend this route to travellers who want to explore Kilimanjaro's western landscapes and enjoy a less crowded approach during the early stages of the climb. However, the route's high starting elevation requires careful consideration because climbers may experience altitude symptoms from the first day.
The Shira Route is commonly offered as a six-, seven-, or eight-day trek, depending on the itinerary and operator. The shorter itinerary involves a more compressed schedule, while the longer versions provide additional time for acclimatization and rest. Arrival and departure days are usually separate from the number of days spent trekking on the mountain.
At Kizza Adventures, we recommend considering an eight-day itinerary where available, particularly for climbers arriving from low-altitude destinations without previous acclimatization. The Shira Route begins high on the mountain, so additional time can be valuable. A longer itinerary does not guarantee reaching Uhuru Peak, but it provides more opportunity to adjust to altitude and manage the physical demands of the climb.
The Shira Route generally starts trekking at approximately 3,400 –3,600 metres above sea level, depending on the designated access point and itinerary. After registering at Londorossi Gate, climbers travel by vehicle along a mountain track towards the Shira Ridge or the designated trailhead. This allows trekkers to bypass much of the lower rainforest section that is included in the Lemosho Route.
Starting at this elevation is one of the most important things to understand before booking the Shira Route. Travellers arriving directly from destinations near sea level may have limited time to adjust to the reduced oxygen availability. At Kizza Adventures, we encourage clients to discuss their travel schedule and previous altitude experience with us before choosing this route, as the high starting point is not suitable for everyone.
The Shira Route is generally considered a moderately difficult to strenuous high-altitude trek. The initial walking across the Shira Plateau can be relatively gentle compared with some other sections of Kilimanjaro, but the route becomes more demanding as it joins the mountain's higher trails. Climbers must manage long walking days, rocky terrain, steep ascents and descents, cold temperatures, and the physical effects of altitude.
From our perspective at Kizza Adventures, the most important challenge is not simply the distance covered each day but how your body responds to the high starting elevation. Good physical preparation helps you handle the walking, but it does not prevent altitude sickness. We encourage clients to train before the climb, maintain a steady pace, communicate symptoms early, and choose an itinerary that allows sufficient time for acclimatization.
Yes, beginners can complete the Shira Route if they have good physical preparation and can manage the demands of high-altitude trekking. Previous technical climbing experience is not required because the standard route follows established mountain trails. However, being new to mountaineering is different from being new to high altitude, and that distinction is particularly important on the Shira Route.
At Kizza Adventures, we advise first-time high-altitude trekkers to consider their options carefully before choosing this route. The high starting elevation can make the first days challenging for people who have not acclimatized. If this is your first experience above 3,000 metres, a route that begins lower, such as Lemosho, may offer a more gradual introduction to the mountain. The best choice depends on your experience, health, available time, and itinerary.
The main difference is the starting point and the early trekking experience. The Shira Route approaches the mountain from a high trailhead on the western side, while the Lemosho Route generally begins lower down and includes a rainforest trekking section. Both routes cross the western side of Kilimanjaro and later connect with trails leading towards the Southern Circuit and the summit.
At Kizza Adventures, we explain this distinction because the routes can share much of the same terrain later in the climb, but their early acclimatization profiles are different. Lemosho allows climbers to gain altitude more gradually at the beginning, whereas Shira involves a rapid vehicle transfer to a high elevation. For travellers who value the western scenery but are concerned about starting high, Lemosho may be the more appropriate option.
A summit success rate of approximately 75-80% for a seven-day itinerary, these percentages are estimates rather than a universal, independently verified success rate for every Shira Route expedition.
At Kizza Adventures, we recommend choosing an itinerary that gives your body adequate time to adjust to altitude, with an eight-day climb worth considering for many travellers. Your individual chances of reaching Uhuru Peak depend on acclimatization, health, weather, preparation, and how your body responds during the trek. At Kizza Adventures, our company summit success rate on the Shira Route is 90%.
The best itinerary depends on your previous altitude experience, physical preparation, and the amount of time you can spend on the mountain. Six-day and seven-day options are available, but shorter itineraries provide less time for adjustment. An eight-day itinerary can allow a more gradual schedule and additional opportunities for acclimatization, making it an option worth considering for climbers who have not recently spent time at high altitude.
At Kizza Adventures, we encourage clients to compare the full day-by-day itinerary rather than selecting a climb based on price or duration alone. Ask where you will sleep each night, how high you will trek and sleep, and whether the plan includes appropriate acclimatization opportunities. If you have limited experience at altitude, tell your guide and operator before booking so they can help you assess whether the proposed itinerary is appropriate.
The Shira Route normally starts at the Londorossi Gate area, where park entry procedures take place, followed by a vehicle transfer towards the high-altitude Shira access point. The precise starting location for walking depends on the itinerary, road conditions, and park arrangements. From there, trekkers cross the Shira Plateau and continue towards the mountain's higher camps and the summit.
After the summit attempt, climbers usually descend through Mweka Camp and continue to Mweka Gate on the southern side of Kilimanjaro. This means the route starts on the western side and finishes on a different side of the mountain. Kizza Adventures can coordinate transfers according to the booked package, but clients should confirm whether airport transfers, hotel accommodation before and after the climb, and other ground arrangements are included.
The camps used on the Shira Route depend on the length of the itinerary. A typical seven-day schedule may include Simba Camp or Shira 1 Camp, Shira 2 Camp, Barranco Camp, Karanga Camp, Barafu Camp, and Mweka Camp during the descent. Some itineraries include additional acclimatization time or use different overnight arrangements, so the precise sequence should always be checked before booking.
At Kizza Adventures, we encourage clients to review the camping schedule alongside the altitude profile. Sleeping at higher elevations can affect how well your body adjusts, and understanding the location of each camp helps you prepare mentally and physically. Lava Tower is commonly visited as a daytime acclimatization stop on itineraries that travel through this area, rather than being used as an overnight camp on the standard route.
The Shira Plateau is a broad, elevated landscape on the western side of Mount Kilimanjaro, formed from the remains of an ancient volcanic structure. It is known for its open moorland, distinctive vegetation, expansive views, and dramatic perspective of Kibo, the main volcanic summit of Kilimanjaro. The relatively open terrain gives climbers a very different experience from the dense rainforest found on lower sections of other routes.
For many visitors, crossing the Shira Plateau is one of the highlights of this route. At Kizza Adventures, we appreciate that it offers opportunities to enjoy the mountain's scenery away from the busiest early trail sections. However, the plateau can be cold and windy, and its high elevation means climbers should move at a comfortable pace.
The early section of the Shira Route is often quieter than the popular Machame Route, especially across the western approach and the Shira Plateau. This can appeal to travellers who prefer a more peaceful start to their trekking experience and want time to appreciate the landscape without encountering large numbers of other groups on the trail.
However, the Shira Route becomes busier after it connects with other routes leading towards the Southern Circuit. Camps and shared trail sections can therefore have trekkers arriving from different starting routes. At Kizza Adventures, we describe Shira as a route that can offer a quieter early experience rather than promising solitude throughout the entire climb.
Both the Shira and Machame routes require good physical preparation, several consecutive days of trekking, and the ability to manage high-altitude conditions. The Machame Route begins lower and takes climbers through the rainforest before ascending through the mountain's vegetation zones. The Shira Route uses a vehicle transfer to a much higher starting point, which changes the early acclimatization demands even though the two routes later share parts of the mountain's trail network.
At Kizza Adventures, we advise clients not to judge these routes by scenery or walking distance alone. The Shira Route's high starting elevation can make the first days physiologically challenging, while Machame's longer ascent from the lower slopes gives the body more gradual exposure to increasing altitude.
Summit night usually begins around midnight from Barafu Camp, although the departure time can vary depending on weather, the guide's assessment, and the itinerary. Climbers ascend slowly in darkness towards Stella Point on the crater rim and then continue towards Uhuru Peak at 5,895 metres if their health and conditions allow. The climb is demanding because the terrain is steep, temperatures are cold, and oxygen availability is low.
After the summit attempt, climbers normally descend towards Barafu Camp and continue to a lower camp, commonly Mweka Camp, according to the planned schedule and the group's condition. Summit night requires warm clothing, a headlamp, suitable gloves, adequate nutrition, and close communication with the guide team. At Kizza Adventures, we emphasize that a summit attempt should never take priority over a climber's safety, and anyone who develops concerning symptoms may need to stop and descend.
Altitude sickness occurs when the body does not adjust adequately to the reduced oxygen availability at high elevations. Common symptoms include headache, nausea, dizziness, unusual fatigue, and loss of appetite. Because the Shira Route starts at approximately 3,400-3,600 metres, some climbers may experience symptoms early in the trek, particularly if they have arrived from a low-altitude destination without time to acclimatize.
At Kizza Adventures, we encourage every climber to report symptoms to the guide immediately rather than attempting to hide them to continue the journey. Severe breathlessness at rest, confusion, difficulty walking straight, or worsening symptoms require urgent medical assessment and may require immediate descent.
On a guided Kilimanjaro climb, meals are generally prepared by the mountain crew and served according to the trekking schedule. Meals commonly include carbohydrates, vegetables, fruit, and protein sources to help support energy needs during long walking days. The exact menu and any special dietary arrangements depend on the operator and package, so clients should communicate food allergies, dietary restrictions, and preferences before travelling.
As Kizza Adventures drinking water must be treated appropriately before consumption, and climbers should carry reusable water bottles or a hydration system during the trek. At Kizza Adventures, clients should confirm how drinking water is supplied, which meals are included, and whether additional drinks or snacks are provided. Eating regularly and drinking appropriately can support your trekking effort, but neither replaces gradual acclimatization or professional assessment of altitude symptoms.
Essential equipment includes well-fitted hiking boots, moisture-wicking base layers, insulating clothing, a waterproof jacket and trousers, warm gloves, a warm hat, and a headlamp with spare batteries. Climbers should also bring a suitable daypack, trekking poles, sunglasses, sunscreen, personal toiletries, and an appropriate sleeping bag. The mountain can be warm during some daytime sections but extremely cold at higher camps and around the summit.
Because the Shira Route begins at a high elevation, it is particularly important to have warm clothing and weather protection ready from the first day rather than packing them away until later in the climb. At Kizza Adventures, we recommend testing your boots and equipment before arrival and using a detailed packing list. Confirm which items are included in your package, which can be rented, and which you must bring yourself.
The main drier climbing periods on Mount Kilimanjaro are January to early March and June to October. These periods are popular because they often offer favourable trekking conditions and opportunities for clear mountain views. However, the weather on Kilimanjaro is variable, and rain, strong winds, low temperatures, and snow can occur even during months that are usually considered drier.
At Kizza Adventures, we advise clients to choose dates that fit their travel schedule while preparing for changing mountain conditions. Booking in advance can help secure preferred dates and allow sufficient time for training and equipment preparation. The best month also depends on your preference for trail conditions, visibility, and the number of other trekkers.
The Shira Route can be completed safely by appropriately prepared trekkers when the climb is carefully planned and altitude-related risks are managed responsibly. However, its high starting elevation is an important consideration for people who have never trekked at altitude. Starting the trek at approximately 3,400-3,600 metres can expose climbers to altitude stress sooner than routes that begin lower on the mountain.
At Kizza Adventures, we encourage first-time Kilimanjaro climbers to discuss their fitness, medical considerations, travel schedule, and previous altitude experience before selecting this route. A longer itinerary may offer more time for acclimatization, but it does not remove the risk of altitude sickness. Our approach should include appropriate pacing, regular health checks by the guide team, clear emergency procedures, and a willingness to descend when necessary.
Choosing a trekking operator is an important part of planning your Kilimanjaro adventure. Travellers should look for a clearly structured itinerary, knowledgeable mountain guides, transparent package pricing, suitable camping equipment, appropriate meals, and established procedures for managing altitude-related problems. A reliable operator should also explain which services are included in the quoted price and which expenses must be paid separately.
At Kizza Adventures, our goal is to help clients prepare for the realities of climbing Mount Kilimanjaro while enjoying the scenery and experience of the Shira Route. Before booking, ask us for the complete itinerary, accommodation details, equipment list, package inclusions, and safety arrangements. We encourage every climber to approach the mountain with realistic expectations, good preparation, and respect for altitude. Our priority should always be a well-organized climb that places the health and safety of every client first.
Ways to Climb the Shira Route With Us
The full 7-day trek, a plateau day hike, a festive-season summit — plus the lower-starting Lemosho alternative. Exact per-person pricing is confirmed with your booking.
7-Day Shira Route Trek
Shira Plateau Day Hike
Christmas Shira Summit

Consider Lemosho 8-Day
Planning Your Tanzania Adventure
Everything you need to prepare for your Kilimanjaro climb and Tanzania trip.
Ready to plan your next adventure?
Tell us your ideas, and we’ll craft a personalized travel itinerary and reply within short time.
Ready to Climb the Shira Route?
Speak with a local Kilimanjaro expert today. Get a free, custom itinerary in under 24 hours.